Picture this: You step outside on a warm afternoon, sit back in a wide wooden chair, stretch your legs forward, and instantly feel your whole body relax. That sinking, easy, peaceful feeling is the magic of an Adirondack chair. These chairs are not just outdoor furniture. They represent comfort, tradition, and a kind of slow outdoor living that feels good for the soul.
Yet for something so iconic, buying the perfect Adirondack chair can be surprisingly frustrating. Sizes vary. Some are too upright. Some are too deep. Some feel stiff. Some look great online but feel uncomfortable in real life. Many beginners grab the cheapest one they see, only to end up with wobbly legs, thin wood, or bad angles that make the chair awkward instead of relaxing.

That frustration is exactly why building your own Adirondack chair is becoming so popular. When you build it yourself, you control everything. The angle. The depth. The arm width. The material. The finish. And the best part is that you create something that fits your body and your space perfectly.
This is where Ted’s Woodworking Plans comes in as a trusted option for anyone who wants to build an Adirondack chair that actually feels good. It includes complete step-by-step instructions, diagrams, cut lists, and multiple Adirondack variations. If you’ve ever dreamed of creating truly personalized outdoor furniture, it is one of the best places to start.
This guide will show you how to choose, build, care for, and customize the perfect Adirondack chair. Whether you want to buy one, build one, or upgrade your outdoor space, this is your complete roadmap. Let’s build it together!
What Makes the Adirondack Chair Such an All-Time Favorite
The Adirondack chair is more than wood and screws. It is a classic shape with a story. The original design came from the Adirondack Mountains in New York.
It was handcrafted by people who loved nature and wanted a comfortable way to enjoy the view. That same shape is still used today because it is simple, clever, and almost perfect.
The slanted seat helps your body relax. The tall, curved backrest supports your spine. The wide armrests give space for your drink, book, or even your laptop.
The early chairs were made with simple hand tools and patience. Thus, DIY feels so authentic. When you build one today, you are repeating a tradition that has lasted over a hundred years.
Insight Box: Why Handmade Adirondack Chairs Feel Better
- Handmade chairs are built more slowly, not rushed.
- Each slat gets more attention to detail.
- Adjustments are made by human judgment, not machines.
- Woodworkers naturally create smoother joints and better angles.
This is one reason so many outdoor lovers prefer building instead of buying. A handmade chair simply feels different.
Where the Comfort Really Comes From
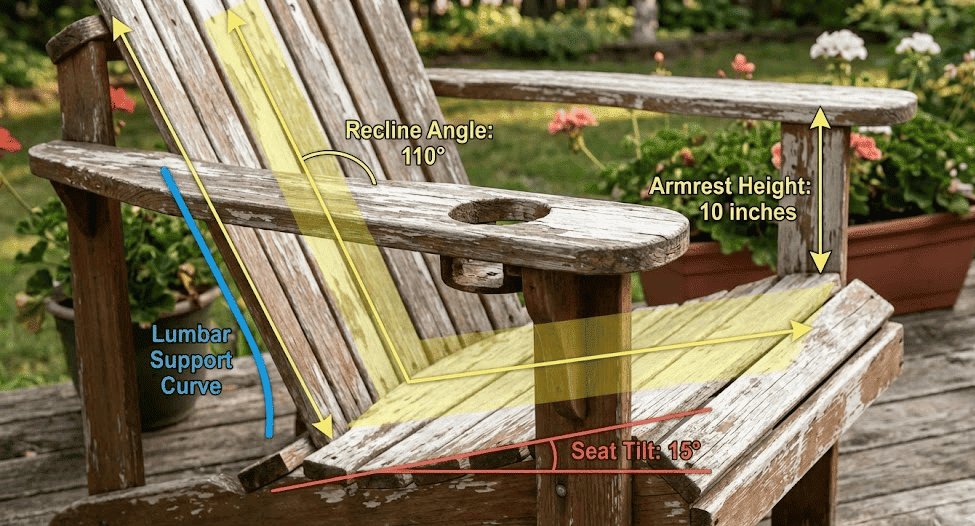
Great comfort is not an accident. Adirondack chairs feel amazing because of a combination of small design choices. Here are the most important ones:
Key Comfort Factors
- Seat depth
A deeper seat lets you sink in and relax rather than sit stiffly. - Reclining angle
That signature laid-back angle is what makes the chair so relaxing. - Armrest width
Wide armrests give your arms room and add to the coziness. - Back curve
A curved back mirrors your spine, making long sitting sessions feel easy. - Seat height
Lower seats feel more relaxing, but too low can feel uncomfortable for some.
When you build your own Adirondack chair, you control every one of these details. You can adjust the curve, change the angle, or add extra width. This is something mass-produced chairs cannot match.
There is also something emotional about it. Sitting in a chair you built with your own hands feels deeply satisfying. Every joint, every slat, every curve carries your effort and pride.
Takeaway:
Custom-built Adirondack chairs always win when it comes to true comfort.
Choosing the Right Material for Your Adirondack Chair
Material choice affects comfort, durability, weight, beauty, and cost. Whether you are buying or building, understanding materials helps you get the right chair.
1. Wood: The Classic and Most Loved
Wooden Adirondack chairs feel natural, warm, and timeless. They look beautiful in gardens, patios, and porches.
Benefits include:
- Natural beauty
- Long lifespan
- Easy to repair and repaint
- Great for DIY builds
Wood is also the favorite material for people building their first chair. And yes, Ted’s Woodworking Plans include detailed Adirondack chair designs optimized for wood. If you love the idea of building something classic and long-lasting, wood is perfect.
2. Poly Lumber
Poly lumber is durable, colorful, and weatherproof. Many store-bought chairs use this material because:
- It resists fading
- It never rots
- It handles rain and sun extremely well
It is great for those who want low-maintenance chairs and do not plan to build.
3. Plastic and Resin
These are the cheapest materials. They are:
- Lightweight
- Affordable
- Easy to move
But they are not ideal for DIY, and they rarely offer the same comfort as wood.
Simple Material Comparison Table
| Material | Durability | Comfort | DIY Friendly | Cost |
| Wood | High | Excellent | Yes | Medium |
| Poly Lumber | Very High | Good | No | Higher |
| Plastic Resin | Low | Fair | No | Low |
Wood clearly stands out for comfort and DIY value. If you want something personal, long-lasting, and beautiful, wood plus the right plan is a winning combination.
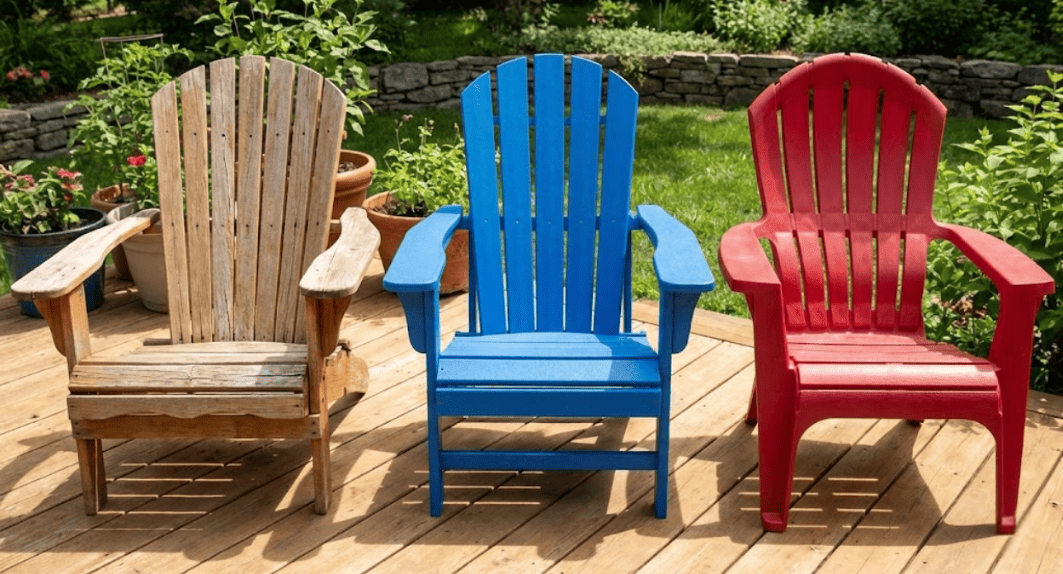
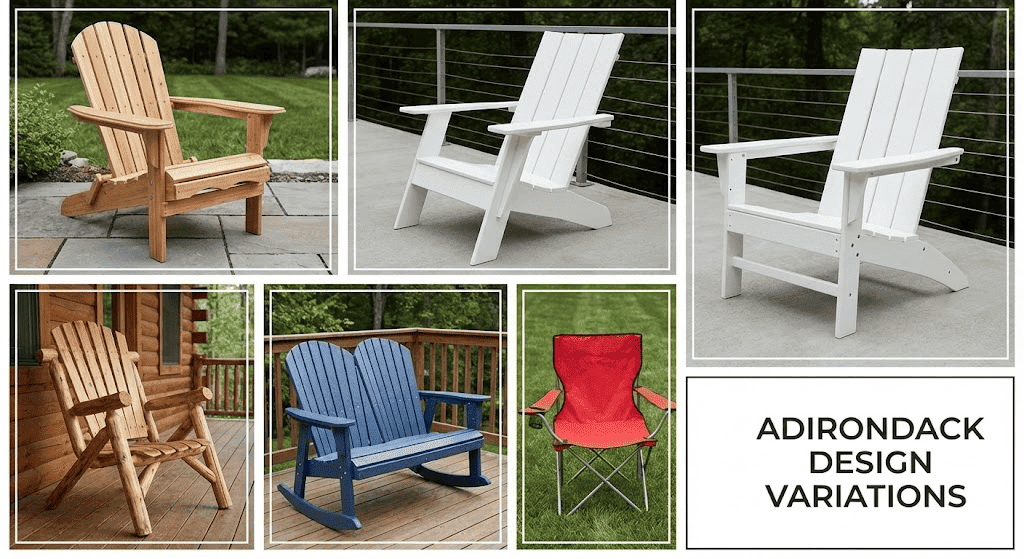
Let’s Look at the Different Adirondack Chair Styles
Adirondack chairs come in more variations than people think. Here are the most popular ones:
1. Classic Adirondack Chair
This is the timeless shape with a slanted seat, curved back, and wide armrests. It is also the most common style included in woodworking plans.
2. Folding Adirondack Chair
This style folds for storage or easy transport. Perfect for small spaces or people who want portability. Yes, it can be built at home following step-by-step plans.
3. Rocking Adirondack Chair
Imagine the comfort of an Adirondack combined with rocking motion. This is a favorite for porches and patios.
4. Modern Adirondack Chair
These have sleeker lines, sharp edges, and a more contemporary shape. Great for modern homes or minimalist gardens.
5. Oversized and Big-Tall Adirondack Chairs
These offer deeper seats, extra width, and higher backs. Perfect for larger body types or anyone who wants maximum coziness.
Reminder:
Ted’s Woodworking Plans includes multiple Adirondack variations, so you can pick the style that fits your home and personality.
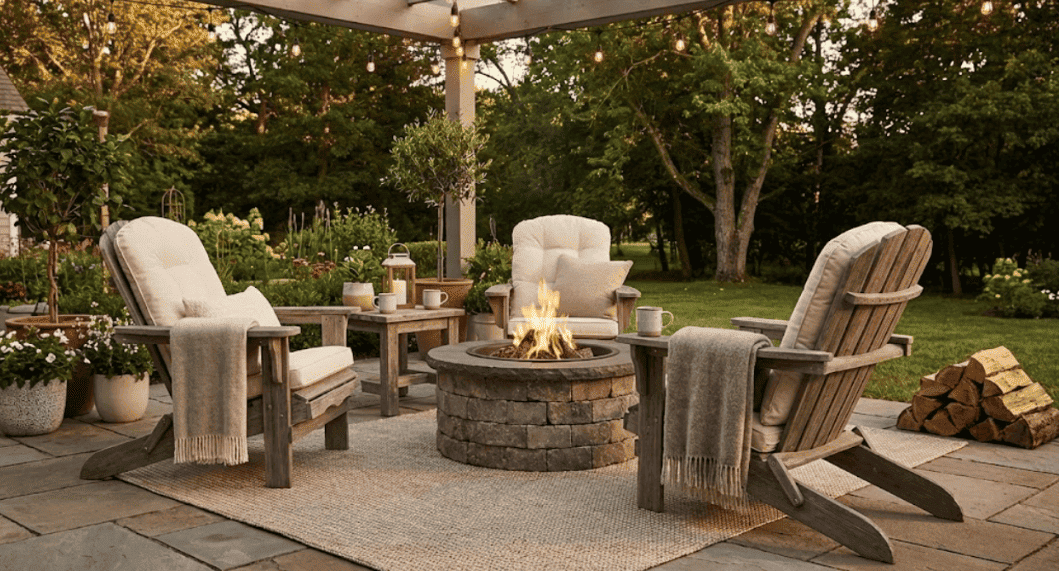
Pick the Right Chair for Your Home and Your Lifestyle
Choosing the right style depends on where your chair will live. Here are some ideas to help visualize it:
- A pair of classic chairs on a wooden porch
- A cozy fire pit zone with oversized Adirondacks
- A garden corner that feels peaceful and shaded
- A small balcony where a folding design fits best
Store-bought chairs have fixed sizes. They may be too small or too large for your space. But when you build one yourself, you can adjust dimensions so the chair fits perfectly.
Takeaway:
DIY gives you more freedom, more choices, and better results.
A Helpful Checklist Before Buying
Here is a simple checklist you can use in-store or online:
- Weight capacity
- Seat height
- Comfort angle
- Slat thickness
- Arm width
- Paint and finish quality
- Warranty
- Material durability
- Maintenance level
Mistakes to Avoid
- Choosing a chair only by color
- Ignoring seat depth
- Not checking wethe ight capacity
- Choosing the cheapest option and regretting it later
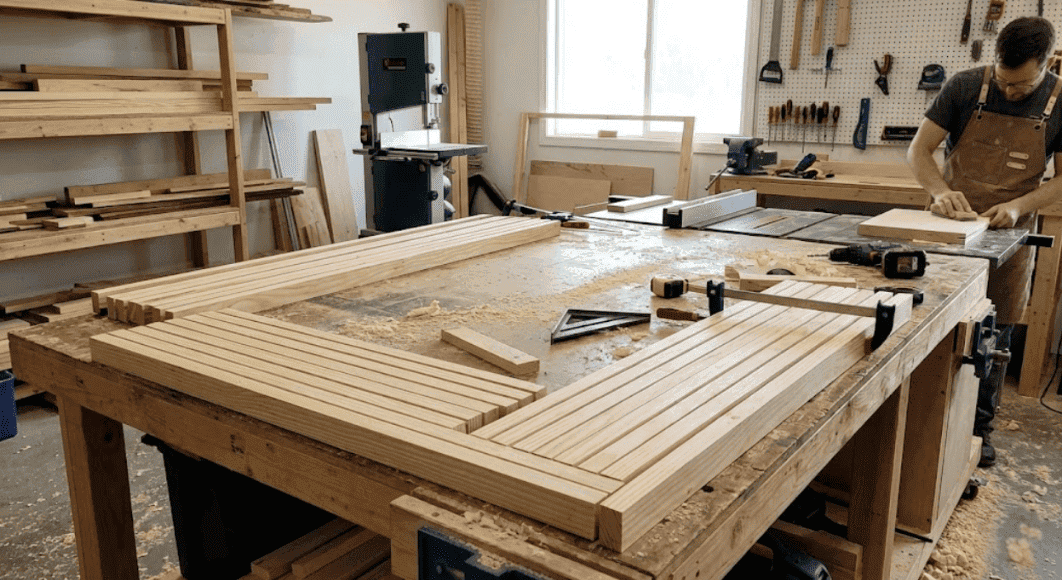
Building Your Own Adirondack Chair
This is where things get exciting. Building your own Adirondack chair is rewarding, relaxing, and surprisingly achievable for beginners.
There is pride in seeing your finished chair sitting on your porch. There is joy in making something with your hands. There is meaning in creating a useful object that lasts for years.
Many people turn their build into a weekend family project. Some give their finished chairs as gifts. Others build multiple chairs because once you learn the process, it becomes fun.
But beginners usually face three common problems:
- Not having the right measurements
- Not knowing how to angle joints
- Not understanding the curves and cuts
This is why Ted’s Woodworking Plans are such a game-changer. It removes the confusion and gives you a clear path.
You get:
- Step-by-step instructions
- Cut lists
- Clear diagrams
- Multiple Adirondack chair designs
- Extra woodworking projects for your home
Even if you have never built anything before, these plans help you finish confidently.
What Ted’s Plans Offer That Most Free Plans Don’t:
- Precise seat angles so the chair actually feels comfortable
- Exact measurements for every slat
- Multiple styles of Adirondack chairs
- Illustrated diagrams that show every joint
- Material and tool lists you can bring right to the hardware store
- Extra woodworking projects for when you feel inspired to build more
The confidence boost is priceless. And once you finish that first chair, you begin seeing your outdoor space differently. You start imagining a matching footrest. A side table.
Maybe even a second chair for a loved one. Building becomes part of the fun, and the results stay with you for years.
Why DIY Adirondack Chairs Feel Different
You pick the wood. You build the comfort angle. You design the finish. Every choice is yours, so the final product reflects your personal style and needs.
That’s why DIY chairs almost always feel better than store-bought options. They simply fit you.
And that’s why so many people turn to Ted’s Woodworking Plans when they want a project that feels doable, enjoyable, and deeply rewarding.
How to Care for Your Adirondack Chair
Once you’ve bought or built your Adirondack chair, caring for it becomes part of the journey. And thankfully, Adirondack chairs are designed to last for years with just a little maintenance along the way. Let’s break everything down into simple, friendly steps you can follow anytime.
Basic Cleaning
A quick clean now and then is all most chairs need. Use mild soap, warm water, and a soft brush. Scrub away dirt and pollen. Rinse. Let it air dry. Simple. Easy. Done.
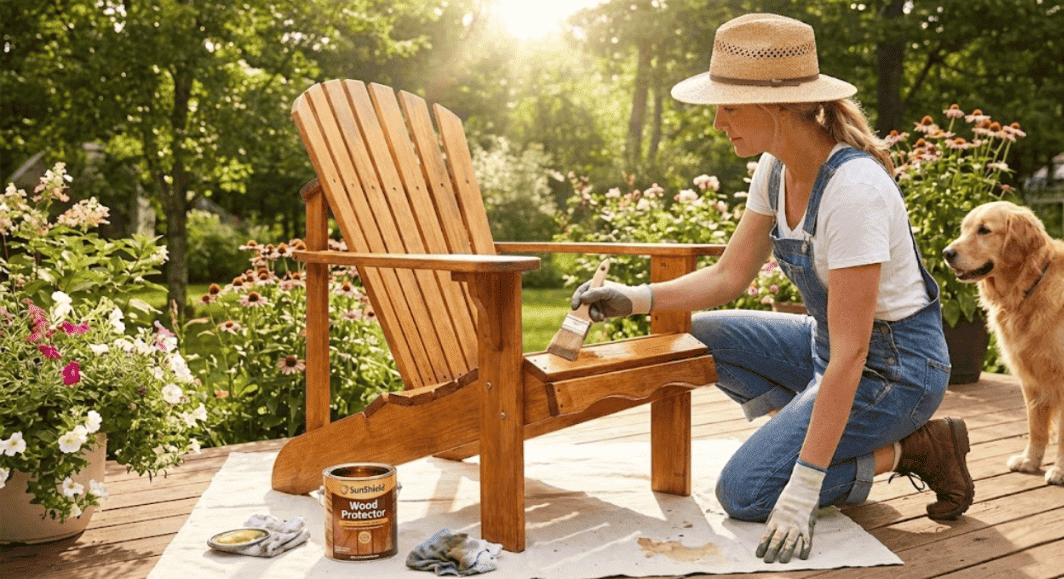
Staining and Sealing
If your chair is made of wood, this is where you help it shine. A good exterior stain protects the grain and boosts durability. You can choose:
- Clear sealants for a natural look
- Semi-transparent stains for a hint of color
- Solid stains for a bold style
Staining once every 1–2 years keeps the wood looking fresh and strong.
Painting Tips
Want color instead of wood tones? Paint works beautifully on Adirondack chairs. Just remember to:
- Sand lightly
- Add a primer
- Use exterior-grade paint
- Add a weatherproof topcoat
This combination keeps the finish smooth and vibrant season after season.
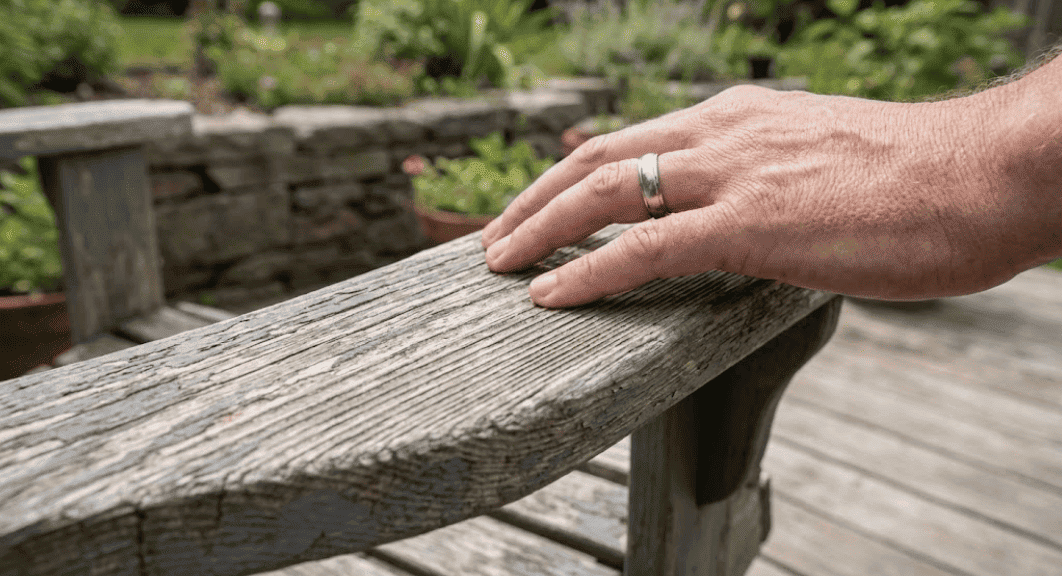
Weather Protection
Rain, snow, and blazing sun can wear down any outdoor furniture. A few simple habits go a long way:
- Store wood chairs indoors during harsh winters
- Use outdoor covers if your climate has heavy rain
- Give the chair a quick wipe after storms
Wood ages beautifully when cared for. It develops a warm, lived-in look over time that feels natural and classic.
Why DIY Maintenance Feels Different
When you buy a chair, maintenance feels like a chore. When you build a chair, maintenance feels like respect.
You know every slat, joint, and curve. You know the hours you put into the project. Caring for the chair becomes easy because it’s something you built with pride.
And if you want to maintain it perfectly, Ted’s Woodworking Plans help you understand the build deeply, which makes long-term care simpler.

Closing Thought
Adirondack chairs will always represent comfort, tradition, and easy outdoor living. They blend history with relaxation. They turn simple moments: morning coffee, sunset watching, backyard gatherings, into memories.
Whether you buy one, customize one, or build one from scratch, you’re choosing a piece of outdoor furniture that stays with you for years.
But if you want the freedom to choose your size, your angle, your curves, your comfort, then building your own Adirondack chair is one of the most rewarding woodworking projects you’ll ever start.
And that’s why so many beginners and hobbyists rely on Ted’s Woodworking Plans. They take the confusion out of woodworking and replace it with clarity, confidence, and creativity.
If you’re feeling inspired, curious, or ready to finally start building something meaningful, this is the perfect moment to explore Ted’s collection and find the Adirondack design that fits your world.
Here’s to comfort. Here’s to craftsmanship. Here’s to the perfect Adirondack chair; whether you choose it, customize it, or build it with your own hands.