I remember the exact moment I knew I needed a shed. It was a Saturday morning, and I was trying to squeeze the lawn mower past my wife’s car to get it out of the garage. I bumped the side mirror, set off the car alarm, and stood there in the driveway, thinking, there has to be a better way.
That’s when I started dreaming about a backyard shed. Not one of those flimsy plastic things you see at the big-box store, but a real, honest-to-goodness wooden shed I could build myself. I wanted something sturdy, something spacious, and something I could be proud to point at and say, “Yeah, I built that.”
After weeks of researching, measuring my backyard, and talking myself out of designs that were way too complicated, I landed on a 10×12 footprint. It felt like the Goldilocks size—big enough to hold all the lawn equipment, gardening supplies, and even a small workbench, but not so huge that it swallowed up my yard or required a small construction loan.
If you’re standing where I was—staring at a cluttered garage, scrolling through shed photos, wondering if you’ve got what it takes to pull off a build like this—let me save you some headaches. I made plenty of mistakes so you don’t have to. In this post, I’ll walk you through everything I learned, from choosing the right plans to that satisfying moment when you hang the last shingle.
Why I Finally Decided to Build My Own 10×12 Storage Shed
I’ll be honest with you. When I got my first quote for a prebuilt shed, I nearly fell out of my chair. Four thousand dollars for a basic box with a single door and no windows? I started thinking about all the woodworking projects I could do with that kind of money.
But it wasn’t just about the cost. I’ve been woodworking for years—building furniture, crafting smaller projects, learning the feel of a good saw and the satisfaction of a tight joint. A shed felt like the natural next step. Something big enough to test my skills but still manageable for a solo builder.
Plus, I liked the idea of building it myself. I could pick the materials. I could add a loft if I wanted. I could stand back at the end and say, “Yeah, I built that with my own two hands.” You can’t put a price on that feeling.
The 10×12 size made sense for my yard. It left plenty of room for the kids to run around but gave me enough square footage to store everything that was clogging up my garage. And after checking with my local building department, I found out I didn’t even need a permit for that size in my area. That sealed the deal.
Picking the Right 10×12 Shed Plans for Beginners
I’ll be honest with you: when I first started looking for shed plans, I got overwhelmed fast. There are thousands of options out there, and half of them assume you already know what a “rafter tail” is or how to calculate a roof pitch without breaking into a sweat.
I almost bought a set of plans that looked gorgeous in the photos but had instructions so vague I would’ve needed a second mortgage just to pay for the phone calls to my contractor uncle.
That’s when I realized I needed something different. I needed the best 10×12 shed plans for beginners—plans that didn’t assume I had twenty years of framing experience. I needed clear diagrams, a full material list, and instructions written in plain English. Most of all, I needed plans that explained why I was doing something, not just what to do next.
I eventually found Ryan’s step-by-step shed-building plans, and honestly, it felt like someone had finally written plans for a regular person like me. Every step was broken down in a way that made sense. There were diagrams I could actually follow, and when I had a question, the answers were right there in the margins.
If you’re new to building, don’t make the same mistake I almost did by grabbing the prettiest plans you find. Look for the best 10×12 shed plans for beginners that prioritize clarity over flash. Trust me, your future self will thank you when you’re not standing in a pile of lumber wondering where the studs go.
My 10×12 Shed Foundation Options (And What I’d Do Again)
I’m going to tell you something embarrassing. When I first started planning this shed, I thought you just… plopped it on the ground. Like, build the floor frame, set it on the dirt, and call it a day.
Yeah. I was that guy.
Thankfully, I mentioned this plan to my neighbor Chuck before I started cutting anything. Chuck’s the kind of guy who wears suspenders and has opinions about soil compaction. He looked at me like I’d just suggested roofing a shed with cardboard.
“You’re gonna need a foundation,” he said, in that slow, patient voice people use when they’re trying not to laugh at you.
So I went down the rabbit hole. I spent an entire weekend researching 10×12 shed foundation options, and let me tell you, there’s a lot more to it than I ever imagined. I looked at concrete slabs, gravel pads, deck blocks, and something called a “floating foundation” that sounded like magic but was really just a clever way to use crushed stone.
Each option had its pros and cons. A concrete slab was tempting—solid, permanent, and no critters nesting underneath. But the price tag made my eyes water, and honestly, the thought of pouring that much concrete by myself gave me heartburn.
A gravel pad with deck blocks was cheaper and still pretty sturdy. A lot of folks go that route, and I don’t blame them. But I kept coming back to something I’d read about building a 10×12 shed on skids.
Here’s why that idea stuck with me. My yard isn’t perfectly flat, and I wasn’t sure I wanted this shed to be a permanent fixture for the next fifty years. What if I wanted to move it someday? What if I built it in the wrong spot and regretted it a year later?
A skid foundation solves all that. You build the whole shed on pressure-treated runners—basically long beams that act like skis. The shed rests right on top of them, and the whole thing sits on a bed of gravel or paving stones. It’s stable, it keeps the wood off the damp ground, and if you ever need to move it, you can drag it with a tractor or even a heavy-duty truck.
I decided to go for it. I leveled out a spot in the backyard, spread a few tons of crushed stone, and laid those skids down with more careful measuring than I’d done for anything in my life. I checked level so many times my wife started calling me “Bubble Boy.”
When I finally set the floor frame on those skids and everything sat square and level, I stood there for a solid five minutes just grinning. It felt like the first real moment where I thought, okay, I can actually do this.
If I were doing it all over again, I’d still choose skids. They saved me money, saved me from pouring concrete, and gave me flexibility I didn’t even know I needed. Plus, there’s something satisfying about knowing my shed isn’t stuck forever in one spot—it’s just resting there, ready to serve.
Looking back, that whole foundation detour taught me something important. Sometimes the best thing you can do is slow down, ask a neighbor with suspenders for advice, and pick a foundation that matches not just your land but your own comfort level.
Now, with the foundation settled, it was time to start building up. And that’s when things really started to take shape—and when I learned why having a full 10×12 shed plan with a material list is worth its weight in pressure-treated lumber.
The Step-by-Step 10×12 Shed Plan That Kept Me on Track
If there’s one thing I’ve learned from years of woodworking, it’s that I have a bad habit. When I get excited about a project, I want to skip ahead. I want to see what it’s going to look like. I want to stand back and admire it before I’ve even finished the first step.
That habit nearly ruined my shed build about three days in.
I was framing the walls, and I got this brilliant idea that I could save time by assembling all four walls at once, standing them up together, and calling it a day. It sounded efficient in my head. In reality, I ended up with one wall that was slightly out of square, another that didn’t quite line up with the floor frame, and a whole lot of frustration.
That’s when I finally sat down with the exact plans that walked me through every cut and forced myself to follow them in order. No shortcuts. No jumping ahead. Just one step at a time.
What I loved about how to build a 10×12 shed step by step—at least the way these plans laid it out—was that each phase built on the last. You didn’t move to walls until the floor was perfectly square. You didn’t lift rafters until the walls were braced and plumb. It was like following a recipe from a cookbook written by someone who knew I’d try to add extra garlic without reading the instructions first.
I started breaking the build into weekends. Weekend one was the floor and skids. Weekend two was walls. Weekend three was rafters and roofing. Every Saturday morning, I’d pour a cup of coffee, flip to the section I was working on, and just follow the steps.
There was something peaceful about that routine. No guesswork. No standing around wondering what came next. Just work, measure, cut, and repeat.
By the time I got to the roof, I’d stopped trying to be a hero. I was just a guy with a hammer, a good set of plans, and a growing sense that this shed was actually going to turn out okay.
Why I Went with 10×12 Gable Shed Plans for Better Water Runoff
I’ll never forget the day my buddy Mark invited me over to see his new shed. He was proud of it, and he should have been—he’d put in a lot of work. But when I stepped inside, I noticed a dark stain creeping down the back wall. Water was seeping in through a low spot on his flat roof.
That image stuck with me. When it came time to choose a roof style for my own shed, I knew I wanted something that could handle heavy spring rains without a second thought.
That’s what led me to 10×12 gable shed plans. A gable roof—the classic triangle shape—sheds water like a champ. Rain runs right off the sides instead of pooling and looking for ways inside. Plus, I have to admit, I love the way it looks. There’s something timeless about a gable roof that makes a backyard shed feel like a real building.
Before I committed, I wanted to make sure the style would work with my yard and my skill level. I spent an afternoon exploring a free shed plan idea I found online just to get a feel for how the rafters came together and how much headroom I’d have inside. That free plan gave me the confidence to move forward without spending a dime upfront.
Once I saw how doable it was, I went all in on 10×12 gable shed plans and never looked back. Two years later, that roof hasn’t leaked a drop, and I still catch myself admiring the way it looks when the sun hits it just right.
Adding a Loft: 10×12 Storage Shed Plans with Loft
Here’s something nobody told me before I built this shed: no matter how big you build it, you’ll fill it.
I thought a 10×12 footprint was generous. I pictured the lawn mower in one corner, some shelves along the back wall, and plenty of open space to walk around. But about halfway through the build, I started mentally filling that space with everything currently crammed into my garage, and I realized I was going to run out of room faster than I thought.
That’s when the loft idea came to me.
I was scrolling through 10×12 storage shed plans with a loft one evening, just daydreaming, when I saw a design that tucked a storage loft up near the ceiling, above the double doors. It wasn’t a full second floor—just a deep shelf that used all that empty vertical space. Suddenly, everything clicked.
I called up my brother-in-law, who’s built more sheds than I’ve had hot dinners, and asked if he thought I could add a loft without messing up the roof structure. He said it was easy as long as I framed it before the roof went on. So I paused my build, added a few extra supports, and framed out a loft that spans the front half of the shed.
Let me tell you, that loft has been a game changer. Christmas decorations go up there. Camping gear that I only use three times a year lives up there. The kids’ outdoor toys that they’ve “outgrown” but won’t let me donate? Yep, up in the loft.
If you’re looking at 10×12 storage shed plans with loft, don’t let the idea intimidate you. It’s really just a beefed-up shelf. But the storage space it adds feels like you magically doubled the size of your shed without adding a single square foot to the footprint.
And honestly, there’s something satisfying about looking up and seeing everything neatly tucked away overhead. It makes the main floor feel open and usable, which was the whole point of building a shed in the first place.
10×12 Lean-to Shed Plans: A Quick Detour I Almost Took
I have to be honest with you. For about two weeks, I was this close to building a lean-to shed instead of a gable.
It happened when I was over at my neighbor’s house—different neighbor, not Chuck with the suspenders—and he had this modern lean-to shed attached to the side of his garage. It was sleek. It was simple. It had this clean, minimalist look that made my gable plans feel a little old-fashioned.
I came home and immediately started researching 10×12 lean-to shed plans. I was convinced I’d made a mistake. Maybe a lean-to was the smarter choice. Maybe it would look more modern. Maybe I should scrap everything and start over.
My wife found me on the back porch that night with my laptop open, scrolling through lean-to designs, looking like a man who’d just lost his religion.
“What are you doing?” she asked.
“Rethinking everything,” I said.
She reminded me—patiently, kindly, the way she always does—that I’d already leveled the skids, built the floor, and started framing walls. Starting over wasn’t just a change of plans. It was a demolition.
So I sat with it for a few days. I walked around my yard, imagining a lean-to tucked against the property line. I thought about the roofline and how it would look from the street. I thought about snow load and rain runoff and whether a single-slope roof would hold up as well as a gable.
In the end, I stuck with my original plan. A lean-to would have worked fine, and it looked cool, but for my yard and my climate, the gable made more sense. More headroom inside. Better water runoff. A classic look that I knew I wouldn’t get tired of.
The detour taught me something, though. It’s okay to second-guess yourself. It’s okay to explore other options. But at some point, you have to commit and trust the plan you picked. I’m glad I explored 10×12 lean-to shed plans, because now I know I made the right choice for me.
And hey, if a lean-to fits your backyard better, go for it. The important thing is building something that works for your space and your needs.
Let’s Talk Numbers: The Real Cost to Build a 10×12 Shed Myself
Alright, let’s get into the nitty-gritty. How much did this whole thing actually cost?
I’ll be upfront with you because I think it helps to see real numbers. When I first started pricing sheds, I got quotes from three different companies for prebuilt sheds. The cheapest one was around $4,500 delivered, and that was for a basic model with no windows, no loft, and the cheapest siding they had.
I almost choked on my coffee.
So I sat down and started pricing out materials for a DIY build. I made a list. I checked prices at two different lumber yards. I added a buffer for things I knew I’d forget—nails, screws, a new blade for my circular saw.
Here’s roughly what I spent:
- Lumber (pressure-treated for skids and floor, regular pine for walls and roof): $1,400
- Roofing materials (plywood, underlayment, shingles, drip edge): $450
- Siding and trim: $600
- Doors and windows: $300
- Hardware (nails, screws, joist hangers, brackets): $200
- Loft materials: $150
- Miscellaneous (caulk, flashing, paint, brushes): $150
Total: Around $3,250
Now, I’ll be honest—I went a little over my initial budget. Lumber prices were a bit higher than I expected, and I splurged on a nice set of double doors instead of a single door. But even with those extras, I saved over a thousand dollars compared to the cheapest prebuilt option.
And here’s the thing. That prebuilt shed wouldn’t have had a loft. It wouldn’t have been built with my hands. And it definitely wouldn’t have given me the satisfaction of walking out to my backyard and knowing I built every inch of it.
When you’re trying to figure out the cost to build a 10×12 shed yourself, I recommend adding a 15% buffer to whatever you estimate. Something will come up. You’ll decide you want better siding. You’ll realize you need a few extra sheets of plywood. Build that buffer into your budget from the start, and you won’t feel the pinch when surprises pop up.
My 10×12 Shed Roof Material List (No Trips Back to the Store)
I’m going to share a little wisdom with you, and I hope you take it seriously.
Make your material list before you start. Then check it twice. Then have someone else check it.
I learned this lesson the hard way when I was roofing. I thought I had everything I needed. I had the plywood. I had the underlayment. I had a bundle of shingles. I was feeling good.
Then I got up on the roof, and I realized I didn’t have drip edge. So I climbed down, drove to the hardware store, bought drip edge, and drove back.
Then I realized I didn’t have enough roofing nails; back to the store.
Then I realized I’d mismeasured the ridge cap. Back again.
By the end of that Saturday, I’d made three trips to the hardware store. Three. For a roof that took maybe six hours of actual work.
So let me save you the gas money. Here’s a solid 10×12 shed roof material list based on what I actually used:
- Plywood sheathing: 7 sheets of ½inch CDX (for a 10×12 with a gable roof)
- Underlayment felt: 2 rolls (enough to double-layer if you want extra protection)
- Architectural shingles: 4 bundles (always buy an extra bundle for mistakes)
- Drip edge: 80 feet (enough to go around both eaves and rakes)
- Ridge caps: 1 bundle (or cut them from your extra shingles)
- Roofing nails: 10 pounds (1¼inch with a plastic washer for the underlayment, 1¼inch for shingles)
- Starter strip: 1 roll or cut from shingles
If you’re using 10×12 shed plans with a material list that already has this broken down for you, you’re ahead of the game. I wish I’d had that from the start. It would have saved me three trips, about two hours of driving, and a lot of muttered words my kids shouldn’t hear.
The Full 10×12 Shed Plans with Material List I Used
After all my false starts, detours, and hardware store runs, I finally landed on a set of plans that had everything I needed.
They weren’t the cheapest I found. But looking back, they were easily the most valuable.
What I loved about these plans was that they didn’t assume anything. They started with a full cut list—every piece of lumber I needed, premeasured and labeled. They had a material list that actually matched the build, so I wasn’t guessing how many sheets of plywood to buy. And the diagrams were clear enough that even my twelve-year-old could follow along when I put him to work holding the tape measure.
I found these plans after a friend of mine—another DIY guy who’d built his own workshop—pointed me toward the full library of woodworking plans I still reference. I spent an evening poking around, and I realized this was what I’d been missing. Real plans from people who actually build things, not just drawings that look pretty in photos.
The full 10×12 shed plans with material list I used became my bible for the next six weeks. I kept them in a plastic sleeve, carried them out to the worksite every morning, and flipped through them so many times the pages started to soften at the corners.
If you’re ready to stop dreaming and start building, do yourself a favor and get plans that give you everything in one place. You’ll save time. You’ll save money. And you’ll save yourself the frustration of realizing halfway through a Saturday that you forgot to buy the right size joist hangers.
Final Thoughts: DIY 10×12 Shed Plans for Backyard Freedom
I still remember the morning I finished the shed.
It was a Tuesday, which felt weird because most of my big projects end on a Sunday. I’d taken a day off work to finish the last few things—hanging the doors, installing the hasp lock, touching up the paint.
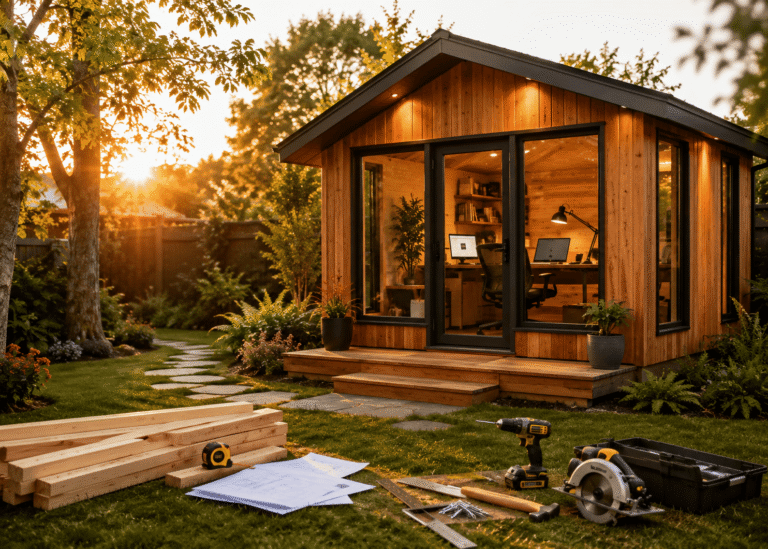
My wife came out with two cups of coffee. We stood in the backyard, looking at this little building that hadn’t existed a few months earlier. The sun was hitting the gable roof just right. The double doors swung open without sticking. The loft was neatly loaded with bins and gear.
“You did it,” she said.
And yeah, I did. But it wasn’t just me. It was the right set of DIY 10×12 shed plans for backyard projects. It was Chuck’s foundation advice. It was the weekends I spent measuring twice and cutting once. It was all the little lessons I learned along the way.
That shed has become more than storage for me. It’s my quiet spot when I need to think. It’s where I go to sharpen tools, organize my thoughts, and remind myself that I’m capable of building something real with my own two hands.
If you’ve been putting off your own shed project because you’re nervous, or you don’t know where to start, or you’re worried you don’t have the skills—take it from a guy who almost built a shed on bare dirt. You can do this. You just need a solid plan, a little patience, and the willingness to learn as you go.
Ready to Build Your Own Spacious Backyard Shed?
Building this 10×12 shed changed the way I think about my backyard, my skills, and what I’m capable of. It gave me space I didn’t know I needed and a sense of pride I didn’t expect. Every time I walk past it, I smile a little. That’s the kind of feeling you just don’t get from a prebuilt shed you ordered off a lot.
If you’re ready to create that feeling for yourself, I’ve got something for you. The plans that guided me through this entire build—from foundation to ridge cap—are available right now. They’ll give you everything you need: clear diagrams, a complete material list, and step-by-step instructions written for real people, not professional contractors.
👉 [Browse the full collection of woodworking plans here]
Whether you’re building a 10×12 like mine or dreaming up something bigger, you’ll find plans that fit your skill level and your backyard.
And while you’re at it, take a look around my Medium posts. I’ve written about all kinds of shed builds in my previous posts—from smaller storage solutions to larger workshop spaces. There’s a whole collection of stories, lessons, and tips from someone who’s been exactly where you are now.
Now go get those plans, clear out your garage, and start building something you’ll be proud of.
Happy building, friends.