A jewelry box can be a great gift for your loved one or you can use it for storing keepsakes. You will find numerous designed jewelry boxes in the market. However, making a DIY wooden jewelry box would be a more cherished gift for your loved one.
If you do not know how to make a jewelry box, then I am here for you. It takes very little time and a few simple steps. In this guide, I will show you how to make a wooden jewelry box without much effort.
After trying out some simple jewelry box plans, you can also try out many new jewelry box designs on your own. Before we get into making a jewelry box, let us check out the tools and materials we would require for the same.
Tools and Materials Needed
- Drum Sander
- Random Orbital Sander
- Miter Saw
- Tablesaw
- Spring Clamps
- F-Clamp
- Walnut (20″ x 4 ½” x ¼”) and (28′ x 2″ 3/16″)
- Maple (3″ x 3 ½” x 3/8″)
In this guide, I will be providing instructions for a jewelry box that is 10 inches in length, 5 inches wide, and 3 inches tall. This box will have a friction lid and floating panels. I gave the jewelry box a book-matched look for which I have used figured walnuts. You can choose any other design or dimension for the box.
A book-matched look is where you use multiple pieces of wood in such a manner that there are mirroring effects of the adjoining surfaces. This is done to give the feeling of a book. The jewelry box will be made from figured walnuts that follow similar patterns.
Step I: Prepare the Panels of the Jewelry Box
Prepare the Walnut Panels
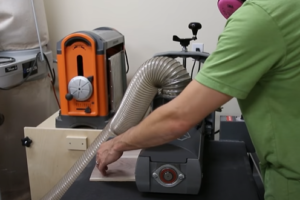
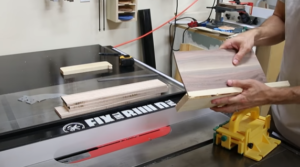
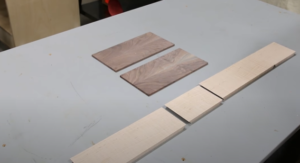
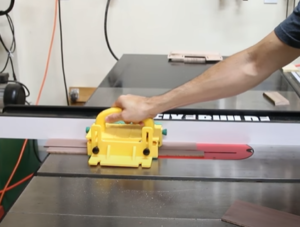
We will start the jewelry box by cutting the figured walnut panels. Take a large walnut piece, plane it properly on one side, and then place it on the bandsaw. Re-saw the board on the bandsaw while maintaining its thickness to ¼ inches.
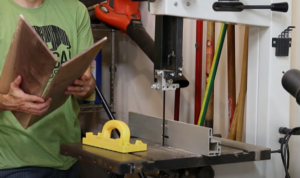
Use the crosscut sled to cut the walnut piece in half. Cut the two pieces into halves so that you have a total of four pieces. Use the bandsaw to sand the pieces so that any bandsaw mill marks are not present.

Book-Match the Panels
In this step you will need to join the figured walnuts. It should be done in such a way that it gives the look of a book.
Glue up the side panels and use your clamps to keep them in place. Wait for the glue to dry up before you re-saw the panels again.
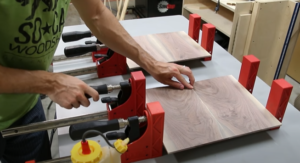
After it has dried for some time, cut the insides of the panels to bring them to the desired size. Re-book match them again and add glue to stick these two pieces together.
If you are not comfortable with the re-book matching process, then you can use the initial four pieces that you have made.
You can keep two panels for this jewelry box and use the other two for any other design. The top and bottom panels have to fit into grooves present on the box’s sides. You will know the process of making the grooves when we move on to the side making.
Step II: Prepare the Sides of the Jewelry Box
Prepare You Maple Piece
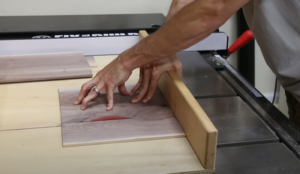
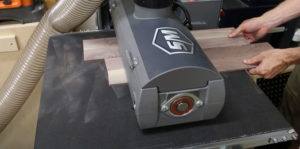
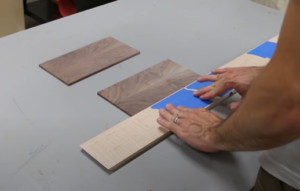
Take your maple piece, which is about 1 inch thick. Rip the maple piece down to width and take it to the bandsaw to re-saw it in half.
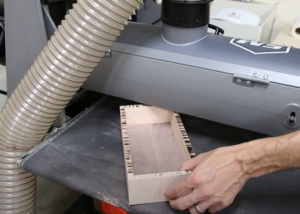
Take the pieces to the drum sander and sand the pieces to about 3 1/8 inches thickness.
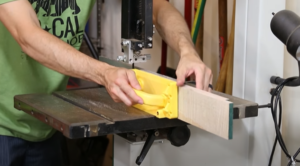
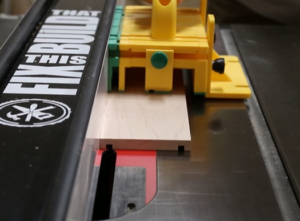
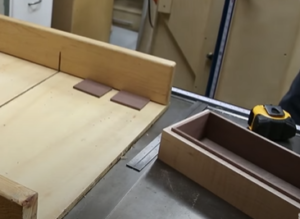
Make the Grooves
For the sides, take the pieces and make one pass on each side of about 3/16 inches. The blade I used was only 1/8 inches, so I made a pass on the boards to get the perfect width.
Keep a spare board with you similar to the dimensions of the top and bottom panel. You can keep testing the right size of your groove until you get the perfect one. This may require multiple passes or even just a few depending on how good you are with your work.
Once you get the perfect fit, make one last pass on both sides and get a good finish to the grooves.
Step III: Cut the Pieces to Correct Size
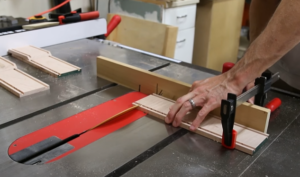
Cut the Sides of the Box
You need to take the side panels and cut them to the perfect length. You can use a stop block on a miter fence to get the correct position and measurement. The long sides of the box will be 10 inches, whereas the short sides will be 5 inches each.
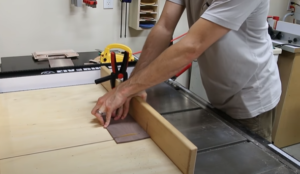
Measure the Panels of the Box
Take the panels of your wooden box and cut them to the right size. Keep the panels slightly bigger than the desired size in case it contracts or expands in the grooves.
Step IV: Assemble the Jewelry Box
Now that you have all the box pieces cut down to the right measurements, it is time to assemble the jewelry box. Keep all the box pieces straight and place them in the order you have cut them. This helps assemble the box quickly without any hassle.
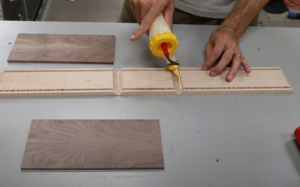
Glue the Box Together
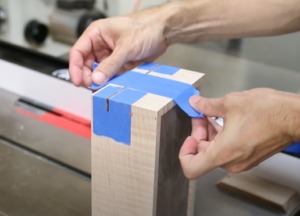
Use blue painter’s tape to stick the pieces together. Using the tape helps you to glue the pieces easily.
Use glue on all the joints of the sides and fold them.
Before folding them, place the side and bottom panels on the base. Make sure that the box’s top and bottom panels fit into the groove properly.
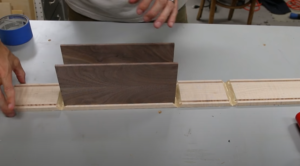
Once this is done, you can fold the other sides and insert the panels in the grooves.
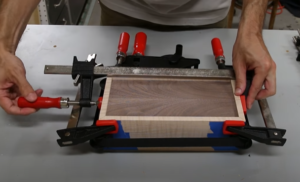
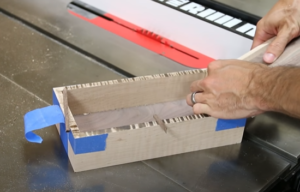
Use a web clamp and some F-clamps on the loose sides of the box. This helps the box to remain in place while the glue is drying. Make sure that the positioning is correct or the shape of the box can go wrong.
Make the Lid of the Box
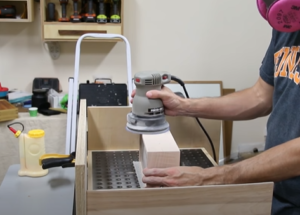
After the glue dries up, sand the sides of your box to 220 grit. Do this before you make the lid since it can become hard.
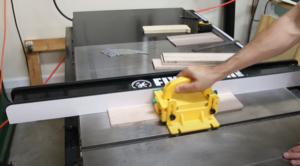
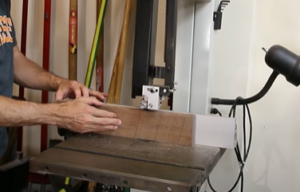
Now we move on to cutting the lid and preparing the final structure of the box. To do this, set your fence to about ¾ inches and raise the blade to ½ inch.
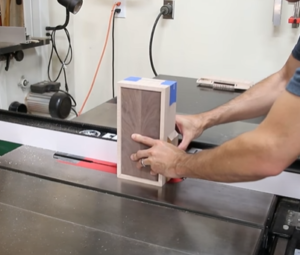
Wrap the corners with blue painter’s tape so that there are no blowouts. You can try this out with a scrap block first before you do it on your actual box. This way, you can rectify if there are any mistakes.
Cut the short sides first and then use tape on about 1/8 inches spacers. This will keep the lid in the right place when cutting the long sides.
In the tape method, you can cut the spacers to not come in contact with the blade while cutting. You can also take the spacer down if you wish.
Finish the Box Structure
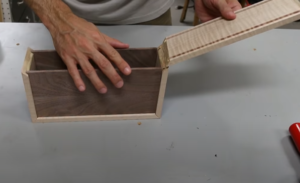
After you are done cutting both sides, you are now ready with the lid. Put the box on your worktable and take the lid off. You can see the insides of the box and how it looks like. If you follow all the other steps properly, then you will end up with the desired size on all ends.
If your box has blowouts, then use the drum sander to get rids of the bits. You can also use sandpaper for this process. Stick the sandpaper on any flat surface and rub the box on the top surface of the sandpaper. This will help you get rid of the bits.
Create the Box Liners
Lastly, you will have to create the liner for the inside of the box. Take a few walnut pieces and flatten them to 3/16 inches on the drum sander.
Cut the liners in the right size to be placed 3/16 inches above the box base and keep the lid in place.
Cut the short pieces first and then place the long pieces. After placing the pieces, test and see if the lid fits properly. Use glue to attach the liners and fix the clamps till it dries out.
Use Finish to Complete the Box
Use 220 grit paper before you go for the finish coating. After everything is done, use a rag to apply a clean coat of finish to the box. Make sure all the sides have an even coating.
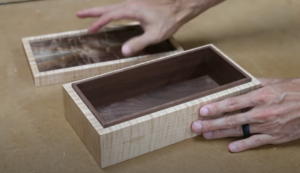
You will end up with a very simple yet elegant DIY wood jewelry box.
Final Verdict
Do you need to keep your daily-wear jewelry or special keepsakes in a box? A jewelry box is a perfect place to do so. You can make many different designs for the box and use it to keep different items.