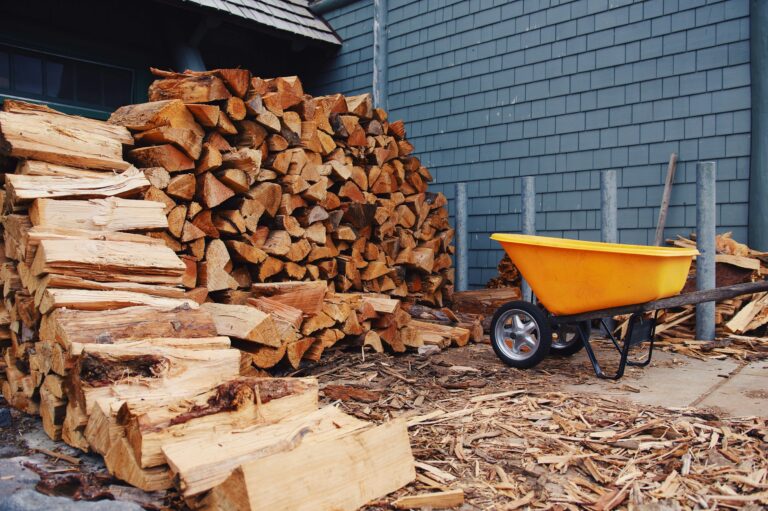
There I stood in the pouring rain, wrestling a flapping blue tarp that had somehow wrapped itself around my head while a stack of firewood I’d spent all summer splitting turned into a soggy, steaming mess right before my eyes.
If you’ve ever been there, you know the feeling. You think you’re being smart. You stack your wood nice and neat against the side of the shed or the garage, throw a heavy tarp over the top, and pat yourself on the back for being a prepared homesteader. That was me three winters ago. I was convinced I had it all figured out. I’d spent weeks splitting oak and hickory, stacking it up in a towering pile, and tucking it in under that tarp like I was putting a kid to bed.
Then spring came.
I peeled back that tarp expecting to find perfectly seasoned, ready-to-burn firewood. Instead, I found a science experiment gone wrong. Mold creeping up the sides. Wood that felt more like a wet sponge than a fuel source. And a smell that reminded me of the time I left a pile of wet laundry in the washer for way too long. My heart sank. All that work, all that time, and I had basically built a mold farm instead of a firewood stash.
That was my wake-up call.
I learned the hard way that firewood doesn’t just need to be covered—it needs to breathe. Tarps trap moisture from the ground below and condensation from the air above. They might keep the rain off, but they also lock in humidity and create the perfect environment for rot. I knew I needed a better solution. I needed something that would let the wind do its job while keeping the rain and snow out.
So I started digging into firewood shed plans that keep wood dry year-round.
I looked at dozens of designs, made a few mistakes along the way (including building one with solid walls that still had airflow issues), and finally landed on a simple, sturdy shed that has kept my wood bone dry through three winters now. No tarps. No mold. No running outside in a downpour to cover a collapsing pile of logs.
In this post, I’m going to share everything I learned so you can avoid the soggy firewood heartbreak I went through. I’ll walk you through the roof design that actually works, the ventilation secrets that keep air moving, and the simple build that any beginner can tackle in a weekend.
Whether you heat your home with wood as I do or just love a good campfire on cool evenings, having dry wood ready to go makes all the difference. Trust me, once you build one of these sheds, you’ll wonder why you ever messed with tarps in the first place.
Let’s get started.
The Big Lesson: Why Tarps Fail (And What Works)
I need to tell you about the winter I finally snapped.
It was January, about 6:30 in the evening, and the temperature was dropping fast. My wife had the fireplace going, but I’d just grabbed the last dry log from the stack by the back door. The rest of our wood was out by the barn, buried under that tarp I thought was so clever back in September.
So I grabbed my flashlight, pulled on my boots, and trudged out into the cold.
The tarp was frozen stiff. Not just stiff—frozen into a solid, crinkly sheet that refused to budge. I tugged at one corner and the whole thing shifted, sending a cascade of ice chunks down the back of my neck. I yanked again, and the tarp slid sideways, taking half the wood pile with it. Logs tumbled everywhere. I was standing in six inches of snow, holding a frozen tarp that was now half-buried, with firewood scattered around my feet like a giant game of pickup sticks.
I stood there for a minute, just breathing steam into the cold air, and thought to myself, There has to be a better way.
That’s when I finally admitted my tarp system was a total failure.
Here’s what I figured out after that miserable night. Tarps seem like the easy answer. You throw one over your pile, weight it down with a few bricks or spare logs, and call it done. But tarps have two big problems that nobody talks about.
Problem one is ground moisture.
When you stack wood directly on the ground and throw a tarp over it, you’re basically making a tent. The ground stays damp. That moisture rises up into your wood. Meanwhile, the tarp traps that moisture against the logs like a plastic bag wrapped around a sandwich. The bottom layers of your stack end up soaking wet, rotting away before you ever get a chance to burn them.
Problem two is condensation.
I didn’t understand this until I did some reading after my frozen tarp disaster. When the sun hits a dark tarp on a cold day, it warms up the air underneath. That warm air holds moisture. When the temperature drops at night, that moisture condenses on the inside of the tarp and drips right back down onto your wood. So you’re basically watering your firewood like a garden every single day.
I pulled a log from the bottom of that pile come spring, and it literally squished in my hand. I’m not exaggerating. I squeezed it and water ran out like I was wringing out a dishrag.
That’s when I knew I needed a real structure.
The solution ended up being simpler than I expected. Firewood needs two things to stay dry: a solid roof overhead and plenty of air moving through. The roof keeps rain and snow from ever touching your wood. The airflow carries away the moisture that naturally escapes from the logs as they season.
I started looking at different roof designs and quickly learned that not all roofs are created equal. The best setup I found—and the one I eventually built—is a slanted roof with a good overhang. That overhang is critical. It keeps driving rain from splashing up onto the edges of your stack. I made mine with about a foot of overhang on the front and sides, and it’s made all the difference.
Now, before I started building, I knew I needed some guidance. I’d already wasted time and money on my tarp setup, and I didn’t want to mess up again. I found some [step-by-step shed building blueprints] that gave me the confidence to start cutting lumber. Having a real plan made me realize how much I’d been guessing before.
Looking back, I wish I’d skipped the tarp years entirely. But sometimes you have to fail at something to really understand why the right way works. If you’re reading this and you’ve got a tarp-covered pile sitting in your backyard right now, I feel you. I’ve been there. The good news is, with a weekend of work and the right approach, you can build something that actually works and never fight a frozen tarp again.
Choosing the Right Spot and Size
Before I built my firewood shed, I made another mistake that I almost don’t want to admit. I built it in the wrong spot.
See, I had this patch of ground right behind my workshop that wasn’t really being used for anything. It was close to the house, easy to get to, and seemed like a perfectly fine place to stack wood. So I built my shed there, filled it up, and felt pretty proud of myself.
Then came fall, and I noticed something weird. The wood on the back side of the shed wasn’t drying. It had been sitting there for months, but it still felt heavy and damp. I couldn’t figure it out until I stood there one afternoon and watched the sun move across the sky. That perfect little spot I’d chosen? It was shaded by my workshop for most of the day. The back wall of the shed was tucked up against a hill that stayed wet long after rainstorms passed through.
I’d basically built my firewood shed in a damp, dark corner where nothing wanted to dry out.
So I did what any stubborn homesteader would do. I emptied the whole shed, dragged it to a new spot, and started over.
Here’s what I learned about picking the right location.
Sunlight is your friend. You want the open side of your shed—the side where you stack and grab wood—facing south if you can manage it. That way the sun hits your wood directly and helps dry it out. My first shed had the open side facing north. It stayed shady and cool, which sounds nice, but cool and shady means slow drying and higher humidity. Flipping that around made a huge difference.
Wind matters more than you think. If you have a direction the wind usually blows from in your area, point your shed so the wind flows right through the stack. I positioned mine so the prevailing breeze hits the side with the slats and passes through the wood before exiting out the front. It acts like a natural dehumidifier. On a breezy summer day, you can feel the air moving through the logs, pulling moisture out with it.
Drainage is everything. You want your shed sitting on ground that drains well. If water pools around the base after a rain, your bottom row of wood is going to soak it up like a sponge. My new spot is on a slight rise with sandy soil underneath. Water runs right past instead of sitting there.
Now, size is another thing I had to figure out through trial and error. My first shed was too small. I built it thinking I’d just keep a little bit of wood on hand, but then I got serious about heating with wood, and suddenly I was cramming logs in like I was playing Tetris. My second shed is a simple 4×8 footprint, and honestly, it’s the sweet spot for most people.
A 4×8 shed holds about a full cord of wood if you stack it right. That’s enough to get most families through a decent chunk of winter. It also works perfectly with standard lumber lengths. You can buy 8-foot boards and cut them down with almost no waste. And it’s small enough that one person can build it in a weekend without needing a crew to help lift heavy things.
If your yard is on the smaller side or you just want something quick and easy, I’d recommend looking at [simple layouts you can download and take to the lumber yard]. Having a clear plan for the size and dimensions saved me from making my second shed too small like the first one.
The Build: What I Did Right The Second Time
After my location disaster, I was determined to build something that would last. I sat down and mapped out exactly what I needed. No more guessing. No more “that looks about right.” I wanted a solid, functional shed that would keep my wood dry for years without falling apart or needing constant fixes.
Here’s what I ended up with.
Foundation first. My first shed sat right on the ground. Big mistake. Ground moisture crept up into the baseboards and started rotting them within a year. For the new one, I used pressure-treated lumber for anything that touched the ground. I’m talking about the stuff rated for ground contact. It costs a little more, but it’s worth every penny when you’re not replacing rotted boards two years later.
I set everything on concrete deck blocks. They’re those little pyramid-shaped blocks you can get at any home center. They keep the wood up off the soil so air can circulate underneath. I leveled each one with gravel and sand, then built my base frame right on top. It’s solid, it’s stable, and water flows underneath instead of pooling against the wood.
The frame is simpler than you think. I used 4×4 posts for the corners. They’re strong enough to hold the roof and give you something solid to attach your walls to. I set them into the base frame with metal brackets, making sure everything was square before I drove a single screw. My granddad taught me the 345 trick for checking square, and I used it about ten times during this build just to be safe.
Measure three feet along one side, four feet along the other, and the diagonal between them should be exactly five feet if everything is square. It’s an old carpenter trick that hasn’t let me down yet.
The roof is where this shed earns its keep. I went with a lean-to design—just a single slope from high in the front down to low in the back. It’s easier to build than a peaked roof, uses fewer materials, and sheds water like a champ. I put a metal roof on top, and that was a game changer.
Metal roofs are perfect for firewood sheds. Snow slides right off, so you don’t have to worry about weight building up. Rain runs off fast. And metal reflects sunlight instead of absorbing it like asphalt shingles would, which keeps the interior a little cooler and reduces that condensation problem I had with tarps. I found some [DIY firewood shed plans with a metal roof] that gave me the exact measurements for my rafter spacing and roof pitch. Following those plans meant I didn’t have to figure out angles by trial and error.
The overhang was something I paid special attention to. I made the roof extend about a foot past the front edge of the shed and about eight inches past the sides. That little extra coverage keeps rain from blowing in sideways and splashing up onto the edges of my stack. On a windy rainy day, the wood stays completely dry.
Ventilation: The Secret Nobody Told Me
Remember how I said I made mistakes? Here’s one that still makes me laugh when I think about it.
After I built my second shed, I thought I had it all figured out. Good location. Solid roof. Pressure-treated base. I was so proud of myself. But I made the walls solid. Nice tight boards, screwed in with no gaps, because I thought it looked cleaner and more finished.
Then about six months later, I pulled some wood from the back of the stack and found mold again. Not as bad as the tarp days, but still there. Greenish fuzz on a few logs. I couldn’t believe it. I had done everything right, and still, mold was creeping in.
It took me a few days to realize what was happening. The solid walls were blocking the wind. Air wasn’t moving through the stack. Sure, the rain couldn’t get in, but neither could the breeze. Without air circulation, the wood was staying damp, and mold was having a party.
I fixed it by cutting out sections of the walls and replacing them with slats. I left about an inch of gap between each board. Now the wind blows straight through. On a breezy day, you can stand on one side and feel the air moving out the other. That airflow is what keeps the wood dry.
This is what I mean when I talk about building a wood shed to prevent rot and mold. You absolutely need ventilation. The roof keeps rain off, but the gaps in the walls are what actually season your wood. I put slats on the back wall and both side walls. The front stays open for easy access, but those three walls with gaps give me plenty of airflow.
If you live somewhere with high humidity or lots of rain, you might even want to leave a gap at the bottom of the walls too. That lets air in below the stack and helps dry out the bottom row. I added a sixinch gap along the bottom of my back wall, and it made a noticeable difference.
My Recommended Plans and Resources
By the time I built my third firewood shed, I had figured out most of the lessons the hard way. But I’ll be honest with you—I wasted a lot of lumber getting there. I cut boards too short. I misjudged roof angles. I had to redo sections because I didn’t plan ahead. If I had started with proper plans from the beginning, I could have saved myself a lot of time, money, and frustration.
That’s why I always tell people to start with a good set of blueprints. You don’t need to reinvent the wheel. Somebody has already done the math, figured out the material lists, and drawn up the diagrams. All you have to do is follow along.
There’s a [free shed plan idea] out there that I used to get my head around the basic structure. It showed me how to lay out the foundation, space my posts, and frame the roof without overcomplicating things. Having those visuals made the whole project feel less intimidating.
And if you want to go deeper, there’s a whole [library of woodworking plans tailored to homesteaders like us]. I’ve used their designs for everything from my firewood shed to a little tool storage rack I built for my workshop. The plans come with clear measurements, cut lists, and step-by-step instructions that actually make sense. No confusing jargon, no assuming you already know what you’re doing.
The best part is you can pick the style that fits your property. Maybe you want a rustic look that matches your cabin. Maybe you want something sleek and simple that blends into your backyard. Or maybe you just want the most functional, no-fuss firewood shed that gets the job done. They’ve got options for all of it.
Finishing Touches That Made It Mine
Once I had the structure built and the ventilation figured out, I added a few touches that turned a functional shed into something I actually enjoy looking at every day.
I stained mine to match my workshop. That’s purely cosmetic, but I’m the kind of person who likes things to look nice. If you’re building something that sits in your yard where you see it every day, taking an extra hour to stain or paint it is worth the effort. I used a cedar-colored stain that blends in with the trees around my property. It doesn’t stand out or look like an eyesore.
I also set up a simple stacking system inside. I put the driest, most seasoned wood toward the front where I can grab it easily. Wood that’s still seasoning goes toward the back, where it gets the most airflow through the slatted walls. I keep a small rack right by the front edge for kindling and smaller pieces I use to get fires started.
One thing I learned about stacking is that you want to leave a little space between the wood and the back wall. If you pack it tight against the slats, you block some of that airflow you worked so hard to create. I keep about a twoinch gap, and air moves freely behind the stack.
If you’re working with a smaller property or just want something that looks charming next to a porch, I’ve seen some small log cabin-style firewood shed plans that are absolutely beautiful. They use log-style siding and rustic details that fit right in with a cabin or farmhouse aesthetic. I might build one of those for my front yard someday just for the curb appeal.
Conclusion
Building this firewood shed changed how I think about winter prep.
I don’t dread the first big rainstorm anymore. I don’t run outside in the dark with a flashlight, fighting a frozen tarp that doesn’t want to cooperate. I don’t pull logs off the pile and wonder if they’re going to sizzle and smoke instead of burning clean. I just walk out to the shed, grab what I need, and head back inside. Every piece is dry. Every piece burns hot. And I didn’t have to wrestle with anything to get it.
That peace of mind is worth every hour I spent building it.
If you’re tired of dealing with wet wood, moldy logs, and tarps that never seem to stay put, I hope this post showed you that a better way exists. You don’t need to be a master carpenter. You don’t need a garage full of expensive tools. You just need a solid plan, a weekend of work, and the willingness to build something that actually solves the problem instead of patching it.
I’ve shared the lessons I learned the hard way so you can skip the mistakes I made. The right roof design, proper ventilation, good placement, and a foundation that keeps wood off the ground—those four things will get you 90 percent of the way there. The rest is just following a plan and enjoying the process.
Now I want to invite you to take the next step.
If you’re ready to build a firewood shed that actually keeps your wood dry year-round, head over to [the resource I turn to whenever I start a new outdoor project]. You’ll find [detailed blueprints that take the guesswork out of building], with clear measurements, material lists, and instructions that make sense even if you’re picking up a saw for the first time. Whether you want a simple rack with a roof or a full-sized woodshed that holds multiple cords, they’ve got [plans that range from simple racks to full-sized outbuildings] so you can pick exactly what fits your needs and your property.