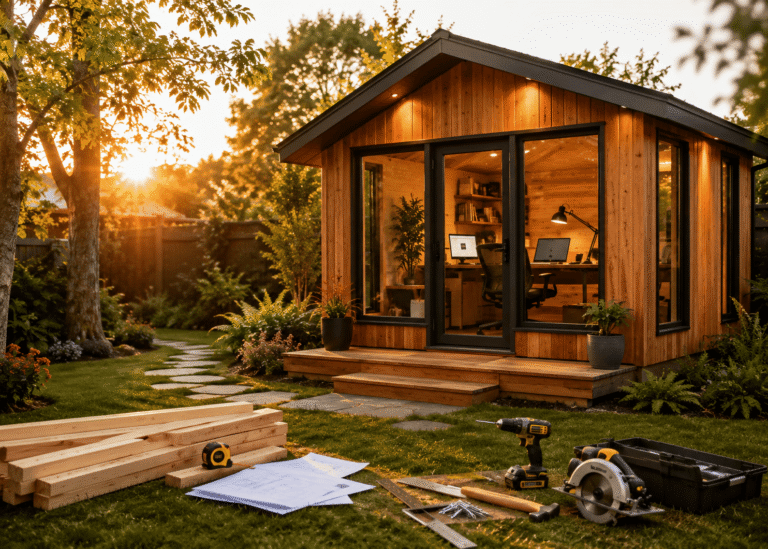
Picture this: It’s Monday morning. You pour a fresh cup of coffee, walk across your backyard, and step into a quiet, sunlit office that smells like cedar and sawdust. No traffic. No kitchen counter doubling as a desk. Just you, your work, and the peaceful sound of birds outside your window. Sounds pretty amazing, right?
If you’ve been dreaming of ditching the spare bedroom or the crowded coffee shop, building a backyard office shed might be the perfect weekend project for you. But I get it. Starting a build like this can feel overwhelming.
Where do you even begin? What about permits? How do you make sure it’s warm in the winter and cool in the summer? And most importantly, how do you avoid those costly mistakes that turn a fun project into a stressful headache?
I’ve been right where you are. As someone who loves woodworking and homesteading, I’ve learned that the secret to a successful build isn’t just having the right tools. It’s having the right roadmap. That’s why for my own backyard office, I turned to step-by-step shed office plans that handle the tricky parts like insulation, electrical, and roofing.
In this post, I’m going to walk you through everything you need to know to build your own backyard home office. We’ll talk about costs, permits, design ideas, and exactly how to make sure your new workspace is comfortable all year round. Grab your coffee, pull up a chair, and let’s get started. Your backyard office is closer than you think.
Why I Built an Office Shed Instead of Adding On to My House
Before I picked up a single tool, I had to make a decision. Do I add a room to my house, or do I build a separate office out in the backyard?
I spent about three weeks going back and forth on this. I got quotes from contractors for a home addition, and let me tell you, my wallet nearly jumped out of my pocket and ran for the hills. We were talking tens of thousands of dollars just to add a small room that would probably end up being the new drop zone for laundry and random junk anyway. You know how that goes.
So I started looking at the backyard option. At first, I thought about just buying one of those prefab sheds from the big box store and slapping a desk in there. But the more I looked into it, the more I realized those things aren’t really built for sitting in for eight hours a day. They get boiling hot in the summer. They’re freezing in the winter. And honestly? They just feel like a shed.
That’s when I stumbled onto the idea of building my own from the ground up using proper plans. And I’m so glad I went that route.
Here’s why building made more sense for me:
I got exactly what I wanted. When you build it yourself, you’re not stuck with whatever the store has in stock. I wanted big windows on the south side for natural light. I wanted a little porch where I could drink my coffee and pretend I’m at a mountain cabin. I wanted the walls framed wide enough for plenty of insulation. With a set of good plans, I got all of that.
I saved a ton of money. I’m not saying this project is cheap. It’s not. But compared to hiring a contractor to add onto my house? I probably saved about 60%. And because I used a complete materials list so you’re not guessing at the lumber yard, I didn’t end up with a garage full of extra wood I didn’t need. Every trip to the store had a purpose.
I learned things I still use today. This is the part I didn’t expect. Before this build, I had built some Adirondack chairs, a couple of raised garden beds, and a pretty wobbly bookshelf that I don’t let anyone look at too closely. But framing a building? Running wire? Installing insulation? I had never done any of that. The plans walked me through every step, and now I feel like I could tackle just about anything.
It added value to my property. A well-built backyard office isn’t just a place to work. It’s a selling point. Real estate folks will tell you that a functional outbuilding with electricity and insulation is a huge plus if you ever decide to sell. And in the meantime, it’s your space.
Now look, I’m not going to stand here and tell you this was the easiest project I’ve ever done. There were days when I was out there in the humidity, sweating through my shirt, wondering why I didn’t just buy one of those prefab units and call it a day. There was a moment when I measured a window opening three times and still somehow cut it wrong. I had to take a walk, drink some water, and come back at it the next morning.
But here’s the thing. When I finished that last piece of trim and stood inside my finished office for the first time, I felt something I don’t think I would have felt if I had just bought something off the lot. I built this. With my own two hands. And every single day I walk out there to work, I still feel that.
If you’re the kind of person who likes knowing how things work, who doesn’t mind getting a little sawdust on your jeans, and who wants a workspace that actually feels like yours, I think you’ll feel the same way.
What to Figure Out Before You Buy a Single Board
I know the excitement of starting a new project. You want to grab your truck keys, head to the lumber yard, and start stacking wood in the driveway. I get it. But trust me on this. Spending a little time on the front end figuring things out will save you from some serious headaches later.
Permits and Zoning
This is the least fun part, but it’s also the most important. Different counties have different rules. Some places let you build a shed up to a certain size without a permit. Others require permits for anything with electricity or insulation. And almost everywhere has setback requirements – meaning how far your building has to sit from your property line and your house.
I almost learned this the hard way. I had picked out my perfect spot, sketched up my plan, and was about to order materials when a buddy asked if I had pulled permits yet. I hadn’t. When I finally made the call, I found out my perfect spot was too close to the property line. I had to shift everything, which changed my sun exposure and my whole layout.
Do yourself a favor and make that call before you do anything else. Better yet, use shed plans that walk you through the permit and zoning process so you’re not guessing.
Budget Breakdown
Let’s talk money. You’ll want to budget for:
Lumber (this will be your biggest expense)
Windows and doors (don’t go cheap here. They matter for comfort)
Roofing materials
Insulation (this is not the place to cut corners)
Electrical components (wire, outlets, breaker box, conduit)
Siding and exterior finishes
Interior finishes (drywall or plywood, trim, flooring)
Foundation materials
A good rule of thumb is to add about 15% to whatever you think it’ll cost. Something always comes up. A tool breaks. You buy the wrong thing and have to exchange it. You decide halfway through that you want nicer windows. Having a little wiggle room in your budget keeps the stress down.
Location, Location, Location
Walk around your yard and really look at your options. Think about:
Sun exposure. Do you want morning light or afternoon light? Where will the glare hit your computer screen?
Tree roots and drainage. Don’t build in a spot that turns into a swamp every time it rains.
Access. How are you going to get lumber and materials to the build site? Can a truck get back there?
Distance to the house. How far do you need to run electrical? Longer runs cost more.
Take your time with this. Walk the spot at different times of day. Picture yourself walking out there with your coffee. Picture yourself trudging out there in the rain. Make sure it feels right.
Designing Your Dream Workspace
This is the fun part. You get to imagine exactly what you want your workspace to look like and how it’s going to function? Don’t rush this. A little time spent dreaming now pays off every day you work in that space.
Size Matters
How big should you go? That depends on what you’re using it for.
Just you, a laptop, and a small desk? 8 x 10 or 8 x 12 might be plenty.
Two people working together? Go bigger. Ten by twelve or ten by sixteen gives you room to move.
Need storage for files, supplies, or tools? Factor that in. A loft can add a lot of space without making the building footprint larger.
I went with a 10 by 12, and for just me, it’s perfect. I have room for a good-sized desk, a small seating area for reading, and a little corner for my filing cabinet. If I had to share the space, I’d probably want something bigger.
Layout Ideas That Work
Think about how you actually work. Are you someone who spreads out papers everywhere? Do you need a dedicated spot for video calls? Do you want a comfy chair for reading and thinking?
Some Layout Ideas To Consider
Desk facing the window for natural light (just watch out for screen glare)
Desk against a solid wall with windows to the side
Loft above for storage so the main floor stays uncluttered
Small porch or overhang outside for taking breaks and enjoying fresh air
Windows and Doors
I can’t overstate how much good windows matter. Natural light makes a space feel bigger and more pleasant. Fresh air is nice too. But think about placement.
I made the mistake of putting a window exactly where it looked nice from the outside, then realized the afternoon glare hit my computer screen right in the middle of my workday. I had to rearrange my whole setup and buy blackout curtains anyway. If I had thought about where my desk was going before I cut those window openings, I could have avoided all that.
Plan your window placement around your desk location, not just what looks good from the curb.
Style Choices
This is your space. Make it yours. Some popular styles for backyard offices:
Modern farmhouse. Clean lines, board and batten siding, black windows. It looks sharp and fits in with a homesteading aesthetic.
Rustic cabin. Natural wood, maybe a metal roof, something that feels cozy and tucked into the yard.
Contemporary. Sleek, simple, lots of glass.
If you’re into the modern farmhouse look, check out these modern farmhouse style elevation and trim details for inspiration on how to pull that off.
Building for Four-Season Comfort
A backyard office is only useful if you can actually work in it year-round. A building that’s freezing in January and boiling in July isn’t really a workspace. It’s just a shed with a desk in it. So let’s talk about making it comfortable no matter what the weather is doing outside.
Insulation Is Non-negotiable
I almost made the mistake of skimping on insulation to save money. I looked at the cost and thought, “Well, maybe I can go a little thinner here and save a couple hundred bucks.”
That was dumb. The first winter, my little space heater ran constantly, my electric bill went up, and I still had cold feet all day. I ended up adding more insulation later, which meant opening up walls I had already finished. It cost me more money and way more time than if I had just done it right the first time.
Do it right from the start. Insulate the floor, the walls, and the ceiling. Use the right R-value for your climate. If you’re somewhere with real winters, you’ll thank yourself later.
Heating and Cooling Solutions
You have options here:
Minisplit systems. These are the gold standard. They heat and cool, they’re efficient, and they’re quiet. They cost more upfront but work great.
Baseboard heaters. Good for heat, but you still need something for cooling unless you’re in a mild climate.
Window units. Cheap, but they take up window space, they’re noisy, and they’re not the most efficient.
I went with a minisplit, and it was worth every penny. My office stays exactly the temperature I want year-round, and I can barely hear it running.
Electrical Needs
Unless you’re an electrician, you’re probably going to want help with this part. You’ll need to run power from your house to the office. That means a trench, conduit, wire, and a subpanel in the office. Think about where you want outlets too. Having outlets right where your desk goes is nice. Having one on the opposite wall for a space heater or fan is also nice.
Plan for more outlets than you think you need. You’ll fill them.
Moisture Control
This doesn’t get talked about enough, but moisture is the enemy of any building. You need:
A vapor barrier under the floor or in the walls
Proper ventilation to let moisture escape
A good roofing system that keeps rain out
If you skip these, you’re asking for mold and rot down the road. Not fun.
The best way to get all of this right is to start with detailed framing plans for a sturdy, four-season office shed. Good plans will spell out exactly how to handle insulation, moisture control, and everything else that keeps your office comfortable and dry.
The Step-By-Step Building Process (Overview)
I’m not going to give you every single step here. That would be a book, not a blog post. But I want to give you the big picture so you know what you’re getting into.
Step 1: Foundation
You have choices here. A concrete slab is permanent and solid. Pier foundations work well in many situations. Skids are the simplest but not ideal if you have freeze-thaw cycles. Pick what works for your soil, your budget, and your climate.
Step 2: Framing
This is where it starts to look like a building. Floor joists go down. Walls go up. The roof goes on. It’s hard work, but it’s also where you really start to see your vision come together.
Step 3: Roofing and Siding
Get the building dried in as fast as you can. Once the roof is on and the siding is up, your materials are protected from the weather, and you can work at a more relaxed pace inside.
Step 4: Windows and Doors
Get these installed and sealed up tight. A gap around a window lets in drafts, bugs, and moisture. Take your time and do it right.
Step 5: Electrical and Insulation
Run your wires, then insulate, then put up your interior walls. Do things in the right order so you’re not tearing stuff out later.
Step 6: Interior Finishes
This is the fun part. Walls, trim, flooring, paint. Make it feel like your space.
If this all sounds like a lot to keep straight, you’re not wrong. That’s why I recommend you skip the guesswork and get office shed blueprints delivered instantly. Having a clear roadmap makes all the difference.
Common Mistakes I Made So You Don’t Have To
I want to be honest with you. My backyard office build wasn’t all smooth sailing and perfect cuts. There were some moments where I definitely learned things the hard way. Since you’re reading this, you get to benefit from my mistakes without actually having to make them yourself. That’s the deal.
Mistake 1: Not Calling The Permit Office First
I thought I could just start building and worry about permits later. Bad idea.
I had picked out my spot, sketched up my plan, and was about to order materials when a buddy of mine asked if I had pulled permits yet. I hadn’t. So I made the call, and it turned out my county had specific rules about how far the building had to sit from the property line.
My perfect spot was about four feet too close. I had to shift everything, which changed my sun exposure and my whole layout. Save yourself the headache and make that call before you do anything else.
Mistake 2: Skimping On Insulation To Save Money
I looked at the insulation cost and thought, “Well, maybe I can go a little thinner here and save a couple hundred bucks.” A couple hundred bucks seemed like a lot when I was watching my budget. Let me tell you, that was dumb.
The first winter, my little space heater ran constantly, my electric bill went up, and I still had cold feet all day. I ended up adding more insulation later, which meant opening up walls I had already finished. It cost me more money and way more time than if I had just done it right the first time. Don’t be like me. Insulate it properly from the start.
Mistake 3: Placing Windows Without Considering Desk Layout
This one still makes me shake my head. I put a window exactly where I thought it looked nice from the outside. Then I set up my desk and realized the glare hit my computer screen right in the middle of the afternoon. I had to rearrange my whole setup and buy blackout curtains anyway. If I had thought about where my desk was going to go before I cut those window openings, I could have avoided all that.
Mistake 4: Underestimating How Long Electrical Work Takes
I figured I’d knock out the electrical in a weekend. Ha. That’s funny now. Between running the wire from my house, digging the trench, dealing with the inspector, and making sure everything was up to code, it took me closer to two weeks. And I’m not an electrician, so there was plenty of time spent watching videos and triple-checking my work. If you’re doing electrical yourself, give yourself way more time than you think you need.
Mistake 5: Buying Materials Before Having A Solid Plan
I got excited. I went to the lumber yard and started grabbing things that I thought I would need. Ended up with a bunch of random stuff, some of which I never even used. Then when I finally got a proven design that saves you money on materials, I realized I had bought the wrong size headers and had to go back anyway. Get the plans first. Then buy the materials. That order matters.
Why Using Proper Plans Makes All the Difference
I’m going to tell you something that might sound obvious, but it took me a while to really accept it. Building a shed office is not the same as building a birdhouse or a workbench. There’s a lot going on. The foundation has to be level. The walls have to be square. The roof has to hold up to snow and rain. And somewhere in there, you’re also running wires and stuffing insulation into every gap.
When I first started thinking about this build, I almost tried to wing it with a sketch I drew on notebook paper. I figured, how hard could it be? I’d built plenty of stuff before. But the more I thought about it, the more I realized I was in over my head. There were so many details I hadn’t even considered. How thick should the subfloor be? What size headers go over the windows? How do you frame a roof so it doesn’t sag after five years?
That’s when I decided to use real plans. And honestly? That decision is the only reason this project turned out as well as it did.
Here’s what good plans gave me:
Detailed framing diagrams. Not just a drawing of what it should look like, but actual measurements, lumber sizes, and connections. I knew exactly what went where.
A complete materials list. This was huge. Instead of guessing, I walked into the lumber yard with a list and walked out with exactly what I needed. No extra trips. No piles of leftover wood I’d never use.
Electrical and window placements. The plans I used had thought through where outlets should go, where windows made sense, and how to lay things out for a functional workspace.
Cut lists. This saved me so much time. I knew every piece I needed to cut before I even turned on the saw.
If you’re the kind of person who likes to figure things out as you go, I respect that. I’m that way too sometimes. But for something like this? something you’re going to spend hours in every day, something you’re putting real money into? Having clear diagrams that make sense even if this is your first shed build is a game changer. It takes all that stress and uncertainty and replaces it with a simple question: What’s the next step?
And when the next step is right there on the page, you just keep going until you’re done.
Frequently Asked Questions
I’ve been talking to folks about this project for a while now, and there are a few questions that come up over and over. I figured I’d answer them here so you don’t have to go digging through forums late at night.
Can I convert a shed into a home office legally?
You can, but it depends on where you live. Some counties treat a converted shed the same as a new build. You’ll likely need permits, and you’ll have to meet the same code requirements for insulation, electrical, and egress windows. The easiest route is to build it right from the start with [plans that walk you through the permit and zoning process] so you’re not trying to retrofit things later.
How much does a small backyard home office cost to build?
This varies a lot based on size, materials, and whether you do the work yourself. For a modest-sized office built with midrange materials, you’re probably looking at somewhere between five and fifteen thousand dollars. If you go all out with high-end finishes and hire out the electrical and HVAC, it’ll be more. But compared to a home addition that can easily hit forty or fifty grand, building it yourself is a bargain.
Do I need a contractor, or can I DIY this?
That depends on your comfort level and your local rules. Some places require licensed electricians to do certain work. But the framing, roofing, siding, and interior finishing? You can absolutely do that yourself if you’re willing to learn. I had never framed a building before I started this project, and I figured it out with step-by-step shed office plans that map out all the tricky parts.
How long does a build like this take?
If you’re working weekends and a few evenings here and there, plan on a few months. I finished mine in about three months, working mostly Saturdays and the occasional Sunday afternoon. If you can take a week off work and go at it full-time, you could get it done faster. But don’t rush. This is a project to enjoy, not something to grind through.
What’s the best foundation for a backyard office?
It depends on your soil, your budget, and whether you want something permanent or semi-permanent. Concrete slabs are rock solid but pricey. Pier foundations are cheaper and work well in many situations. Skids are the simplest but not ideal if you’re in an area with freeze-thaw cycles. The plans I used laid out the options so I could pick what made sense for my yard.
Final Thoughts and Where to Go From Here
I remember standing in my backyard about a year ago, looking at the empty spot where my office now sits. I had this vision in my head of a quiet workspace with big windows, a little porch, and enough room to actually spread out my papers and think. But it felt like a distant dream. Something other people did. Not something a guy who mostly built garden beds and wobbly bookshelves could pull off.
Then I just started. I made the calls. I got the plans. I bought the lumber. And day by day, board by board, it came together.
Now I walk out there every morning with my coffee, open the door, and feel proud. Not because it’s perfect. It’s not. There are little things I’d do differently if I built it again. But it’s mine. I built it with my hands, and every day I spend in there reminds me that I’m capable of more than I give myself credit for.
You are too.
If you’ve been sitting on this idea, waiting for the right time or wondering if you’re skilled enough to pull it off, let me tell you something. The right time is now. And the skill? You’ll build it as you go. Every cut you make, every board you set, every problem you figure out. It all adds up. By the time you’re done, you won’t just have an office. You’ll have a whole new set of skills and a whole lot of confidence.
Don’t let fear of the unknown keep you from creating something amazing in your own backyard.
Ready to start building?
I’ve done the research so you don’t have to. After looking at dozens of options, I keep coming back to the plans that guided me through my own build. They’re clear, they’re complete, and they’re designed by folks who actually understand how real people work in real spaces.
Grab the full set of shed house plans right here and get everything you need to start your build. We’re talking detailed diagrams, a complete materials list, cut lists, and all the details that separate a successful build from a frustrating one.
If you’re still on the fence, you can also check out a free shed plan idea to get a feel for their style. It’s a great way to see the quality before you dive into the full project.