Indoor plants add warmth to your house and make it feel more intimate. However, to keep indoor plant pots in your house, you need good indoor plant stands. You do not want to use old and broken planters for your plant. A mid-century plant stand also provides an aesthetic aura to your home.
You will find it very interesting to make a mid-century DIY plant stand. With a few simple steps, you will have your plant stand ready in no time. In this DIY guide, I will provide a step-by-step process on how to make a wood stand.
Before we get into the process, let us sort out what we need to start the work.
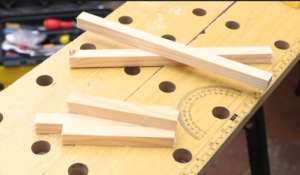
Tools and Materials Required
Step I: Prepare the Stand Base (Method 1)
Measure the Stand Base
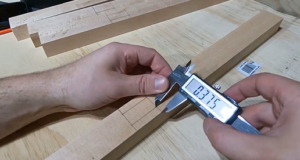
Take the pot for which you want to make the DIY plant holder and measure the base.
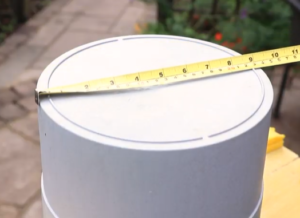
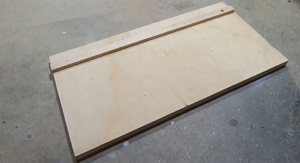
You will need a sturdy wood piece for making the plant stand. Take a long piece of wood for the base and mark the measurements according to the diameter.
Keep the measurement ½ cm more than the base diameter. This will give you room if you need to square the pieces.
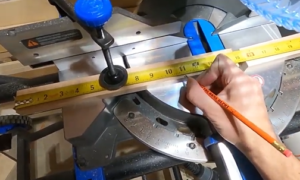
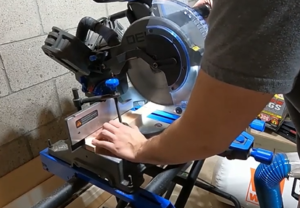
Cut the Stand Base
Cut two pieces of wood in the same length and place them next to each other.
Use a glue roller to spread a thick and even layer of glue on one side of the pieces.

Paste both these sides together and secure them with a clamp.
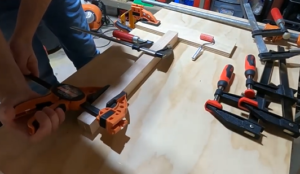
Make sure that the clamp is not too tight but placed firmly. Moreover, the pieces should be positioned properly so that the measurement does not go off. Leave them for some time till the glue dries.
Step II: Prepare the Stand Base (Method 2)
I have mentioned another method that you can use to prepare the DIY wooden plant stand base. You can use either of the preparation methods depending on which one you find easier. The measurement of this method will be the same as the previous one.
One change in this method is that you will need two long pieces and four small ones. The measurement for the four small pieces will be (Pot Diameter / 2) – (Wood Depth /2).
Attach the Longer Pieces
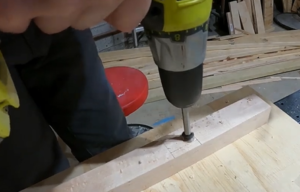
You will first need to attach the two long pieces in a cross shape. Measure the middle points of both the long pieces and drill these points. This is done so that the longer wood does not split when you put the screws in.
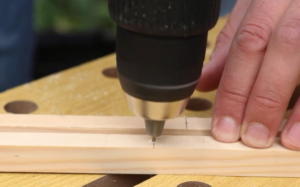
Secure the two pieces across properly.
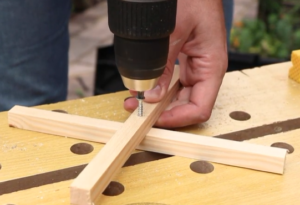
Secure the Short Pieces
Place the four short pieces on either side of the long pieces. Use screws to secure all the wood pieces together. The idea here is to ensure that you have a thick piece of stand base to attach to the legs.
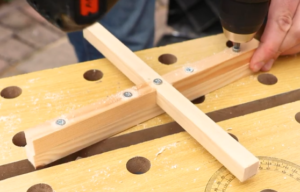
Square the ends of the wood pieces since all the wood pieces will be of different lengths. Here I have mentioned the use of screws to secure the wood pieces. However, you can also use glue to avoid the usage of screws.
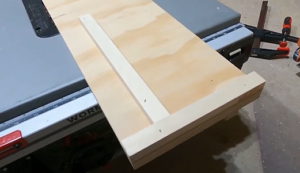
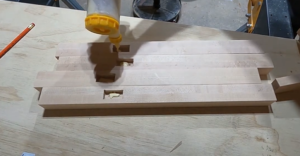
Step III: Plane the Stand Base
Make a Jointing Sled
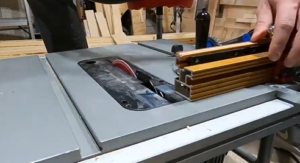
You do not always need a planer or a jointer for this step. If you do not have any of these in your workshop due to any reason, then you can make a jointing sled on your table saw.
Take a piece of long-cut maple and put it in a miter track. Attach this setting on the back of a piece of plywood. Ensure that the miter jig and plywood are attached properly since you will need this setup to square your plant stand pieces.
Run the setup through a table saw, and you will get the squared face that can help you plane and join different pieces.
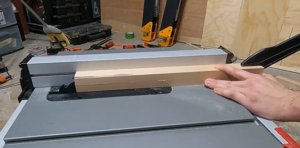
Square the Stand Base
Put your stand base piece on the jointing sled and run it through the table saw. You can run it multiple times till you get a perfectly squared finish. Make sure to keep your fingers away from the saw, or you can end up hurting yourself.
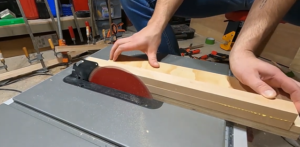
Place the side that you have cut towards the miter fence. Run it again to square the other side of the piece. Make sure that both sides of the square base are squared perfectly.
Step IV: Prepare the Plant Stand Legs
Preparing the legs of the plant stand is a very easy process. You will need to measure the height of the plant stand. Depending on the height, you can make small legs, or you can make longer ones.
Make sure all the legs are of the same length, or the final stand may wobble. This can be unstable for your planter. Square the legs properly so that there are no bits on either side.
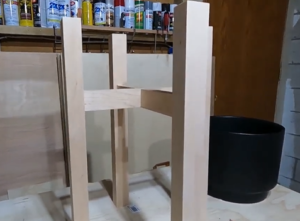
Step V: Assemble the Plant Stand
Mortise Joint on the Legs
Now you have the stand base and the four legs. I have specified the mortise and tenon joints method to assemble the stand. However, you can also assemble it using dowels.
Measure the area where you want to join the stand base. Make sure that the positioning of the joints is the same on all four legs.
Take a Forstner bit to take out the majority of the wood bits from the legs. Do this in the area that you have marked for the joint.
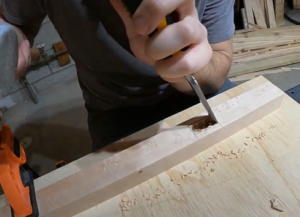
After taking out as much as you can, take a chisel to square out the whole area. Ensure that the joint area is smooth so that you do not have issues assembling the parts later.
When using the chisel, hold your piece with a clamp to not move it of place. This will get the job done quicker, and you do not have to reposition the piece repeatedly.
Inexperienced woodworkers may take some time to finish this step. However, professional woodworkers would be done with the joint squaring in no time. Repeat the same process for all four legs.
Tenon Joint on the Stand Base
Now that you have made the mortise joint on the legs, you will need to make the tenon joint on the four ends of the stand base.
Cut the tenon joints evenly on all four sides, measuring the mortise depth. Make sure that the fit is perfect so that your plant stand is secured. Square the edges properly so that you can do the fitting without any issues.
Put Together the Base and Legs
You have your base and legs ready, along with the mortise and tenon joints. Place the base stand on a smooth surface. Put glue on the four mortise joints and carefully place them on each end of the base stand.
The mortise and tenon joints will secure due to the glue. Let it dry properly before you go for the final stage.
Check if there are any wobbles on the stand. If you have taken the measurements properly, there should be none.
You can use any other joining method to assemble the whole unit. One example of this would dowels, which are also quite easy to use. You need drill holes on the legs and the four ends of the square base to fit the dowels.
These holes will each be half the length of the dowel and will help fix the joints securely.
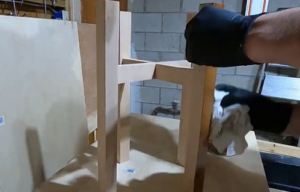
Step VI: Finish the Coating
Use a rag to finish the coating on the plant base stand. Make sure that the coating is spread evenly and on all sides.
You will have a beautiful mid-century plant stand ready to support your indoor plant.
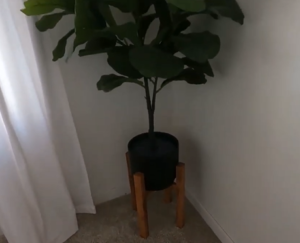
Do you need new aesthetic indoor plant stands for your house? Homemade plant stands can support the numerous plants in your house and save a lot of money.