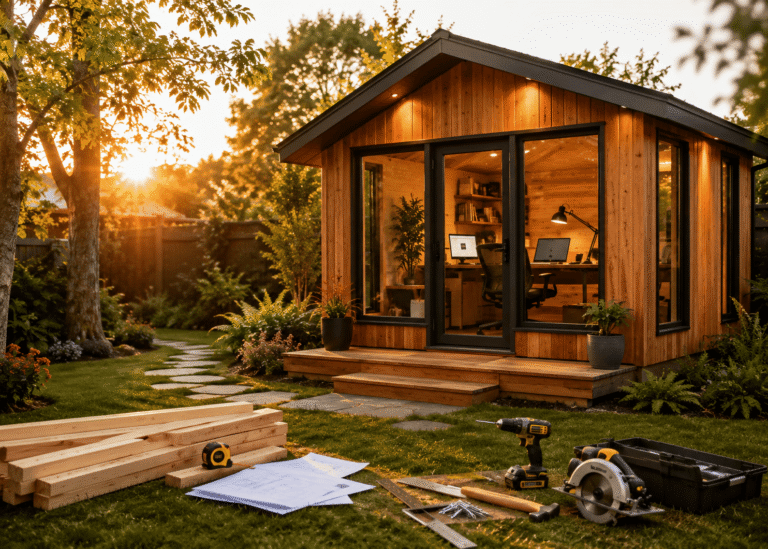
Here’s my step-by-step guide to transforming a damp, dark, or drafty outbuilding into a four-season creative sanctuary.
I. Introduction: Why a Shed, Why an Artist?
I still remember the day I stood in the middle of my own garden shed — a dark, 8×10-foot wooden box that smelled of damp grass, old gasoline, and regret.
A single bare bulb hung from a frayed cord. Spiderwebs draped the corners like sad Halloween decorations. And yet, as I looked at that neglected space, I didn’t see rusted shovels and mouse droppings. I saw a studio.
If you’re reading this, you’ve probably had the same moment. Maybe you’re a painter tired of scrubbing oil paints off the kitchen table. Maybe you’re a writer who can’t focus with laundry staring at you from the hallway. Or maybe you just need somewhere — anywhere — that’s yours. A place where creativity doesn’t have to compete with dirty dishes or Zoom calls.
That’s the magic of a shed conversion. It’s not just about adding square footage. It’s about carving out a psychological boundary between “life” and “art.”

And here’s the practical reality: converting a shed costs a fraction of building a home extension or renting external studio space. In many cases, you can complete a four-season, fully insulated studio for under $3,000 — less than six months of typical co-working rent. Done right, it can even increase your property value. Done wrong? You’ll have a moldy, freezing, or sweltering money pit. That’s where this guide comes in.
Over the course of this article, I’ll walk you through every major step — from assessing whether your existing shed is worth saving, to insulating walls and ceilings, to running safe electrical, to adding those final creative touches that make a space feel like yours. You’ll learn which materials to use (and which to avoid), how to manage moisture so your canvases don’t warp, and why a simple bathroom fan might be the smartest investment you make.
I’ve organized this guide by skill level. Some steps — like air sealing or installing vapor barriers — are beginner-friendly. Others, like running a subpanel from your main house, are best left to a licensed electrician. I’ll tell you exactly where to DIY and where to call a pro.
Before we go any further, a quick but important disclaimer: building codes vary by municipality.
Some towns treat any shed over 120 square feet as an accessory dwelling unit (ADU) requiring permits. Others don’t care unless you add plumbing or a permanent heater. Please check with your local building department before spending a dime. An angry inspector showing up halfway through your drywall installation is not the kind of surprise you want.
Still with me? Good.
Because by the end of this article, you won’t just know how to convert a shed. You’ll be ready to do it. And on that first morning when you walk into your finished studio — coffee in hand, natural light pouring through the windows, a warm floor under your feet — you’ll wonder why you didn’t start years ago.
Let’s build something beautiful.
II. Phase 0: Assessing Your Existing Shed (Don’t Skip This)

Before you buy a single batt of insulation, you need to have an honest conversation with your shed. Not every outbuilding is worth saving, and pouring time and money into a rotten structure is like building a dream house on a swamp.
Structural red flags to check first:
Grab a screwdriver and start poking. If the tip sinks easily into the bottom of the wall framing (the “sill plate”) or into floor joists, you have rot. A little surface rot can be treated. Spongy, crumbly wood means structural failure.
Next, look up. Stained plywood or soft spots on the roof deck indicate leaks that need fixing before insulation. Water is insulation’s worst enemy — it turns fiberglass into a soggy, useless mess and grows mold behind your nice new walls.
Also check for pest damage. Termite mud tubes on foundation walls, rodent droppings in corners, or chewed wiring are all signs that you’ve got unwanted tenants. You’ll need to evict them and seal entry points before proceeding.
Good candidate signs:
Not all hope is lost. Your shed is a good candidate if:
– The framing is solid (even if it’s old and a little crooked).
– Interior height is at least 6’6″ (7 feet or more is ideal for easels or shelving).
– It sits on a decent foundation (concrete slab is best; gravel on pressure-treated skids is acceptable; dirt floor is a hard no).
When to repair vs. replace:

I’ll list everything you need, grouped by phase, so you can buy as you go rather than all at once.
Demolition & prep: Shop vac, pry bar, hammer, screw gun, trash bags, work gloves, safety glasses, N95 mask.
Framing & insulation: Circular saw, utility knife, straight edge, tape measure, insulation (mineral wool recommended), smart vapor retarder (MemBrain), acoustic caulk, expanding foam, staple gun.
Electrical: (Pro recommended for main feed) Wire strippers, voltage tester, fish tape, outlet boxes, 12/2 or 12/3 Romex, switches, receptacles, LED light fixtures, subpanel (if new run from house).
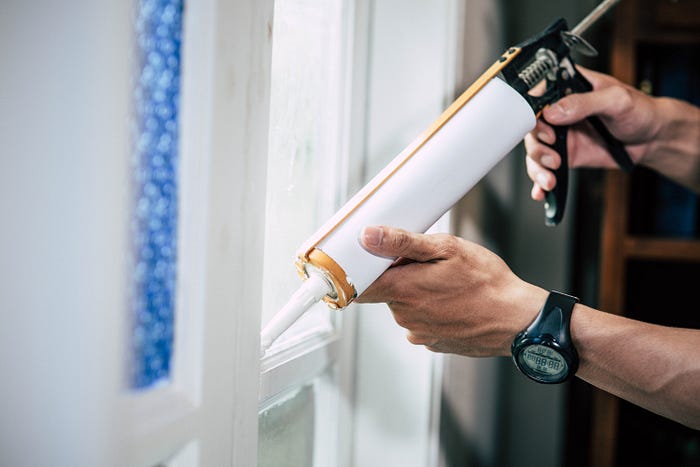
Interior finish: 1/4″ plywood or T&G pine, luxury vinyl plank flooring, underlayment, screws, paint, brushes, caulk gun.
Climate: Oil-filled radiator or mini-split, dehumidifier, exhaust fan, window AC (if no mini-split).
Buy what you need for Phase 0 and Phase 1 first. Don’t stockpile everything — your wallet will thank you.
III. Planning Your Creative Workspace (Layout First)
Here’s the single biggest mistake I see DIYers make: they insulate first, then try to figure out where the desk goes. Don’t do this. Layout drives everything — where outlets go, where lights hang, where the heavy workbench sits.
Start by answering one question: What kind of creative work do you actually do in here?
– Painter: You need a north-facing window (consistent, non-glary light), a sink or cleaning station for brushes, and a wall large enough for a big easel or canvas storage.
– Writer or graphic designer: You need a desk facing a window (views reduce eye strain), a corkboard or magnetic wall for notes and inspiration, and good task lighting.
– Potter or sculptor: You need a heavy-duty floor (reinforced if necessary), a clay sink (with a trap to catch sediment), and sturdy shelving for drying pieces.
– Mixed media/crafter: You need a large central table, pegboard walls for hanging tools and supplies, and generous electrical outlets for glue guns, sewing machines, and more.
Zones to consider:
Even in a small shed, you can create functional zones:
– Dirty zone (near the door): mixing paint, sanding, working with clay, using adhesives.
– Clean zone (furthest from door): computer, finished work, reading chair.
– Staging area: Drying racks, shelving for works-in-progress, shipping supplies if you sell your art.
Electrical planning:

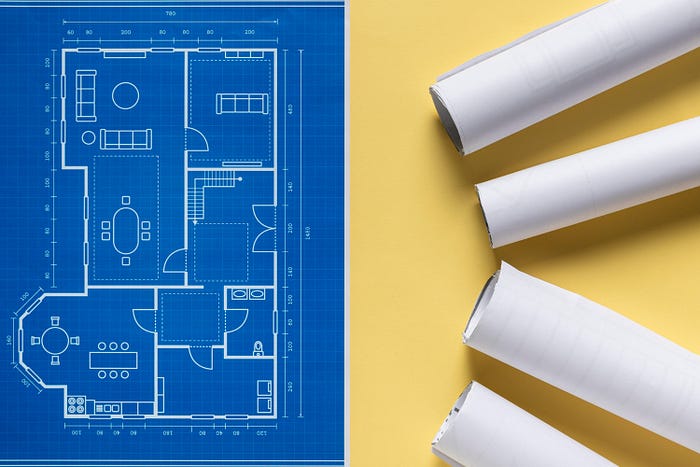
Grab graph paper (or a free tool like SketchUp) and draw your shed to scale. Mark where you want outlets. The electrical code says every 12 feet along a wall, but in a studio, I recommend every 4–6 feet above workbench height.
Also note where you’ll need overhead lighting, task lighting over your desk or easel, and any dedicated circuits (space heaters, kilns, or powerful shop tools).
Map all of this before you insulate. You’ll be running wires through studs, and it’s infinitely easier to do that with open walls.
IV. Step 1 — Empty, Clean, and Prep the Shell
This step is boring. Do it anyway.
Remove every shelf, pegboard, hook, and rusty tool from your shed. If you haven’t used something in two years, donate it or toss it. You’re not building a storage unit — you’re building a studio.
Sweep thoroughly, then follow up with a shop vac. Pay special attention to corners and along the bottom plates of walls. You’d be amazed how much dirt and debris hides there.
Now, seal large gaps. Mice can squeeze through a hole the size of a dime. Use expanding foam (the “minimal expansion” type for windows and doors, or regular for larger gaps) to close up any openings around where the walls meet the floor, or where pipes or wires penetrate the shell.
Note: Expanding foam is for air sealing, not insulation. Don’t try to fill entire wall cavities with it — that’s expensive and ineffective.
Finally, look at your windows. If they’re single-pane or don’t open properly, consider replacing them now. A basic vinyl window isn’t expensive, and it’s much easier to install before you’ve insulated and finished the walls. At a minimum, add secondary glazing film (the shrink-wrap kind you heat with a hair dryer) for an extra layer of thermal protection.
V. Step 2 — Floor Insulation & Underlayment (Often Overlooked)
Cold floors are the number one complaint I hear from shed-studio owners. They’ll make you miserable even if the air temperature is fine. Don’t skip this step.
If you have a wood floor on joists (typical for sheds on skids):
Do you have access to the underside? Great. Slide rigid foam (XPS, not EPS) between the joists, cut slightly oversized so it friction-fits. Hold it in place with furring strips screwed into the joist sides. Then, from above, add a layer of plywood subfloor (at least 1/2 inch) over the existing floor. This creates a thermal break and a smooth surface for your final flooring.
If you have a concrete slab (best-case scenario):
You have two options. The budget-friendly route: lay down 1-inch XPS rigid foam boards directly on the concrete, tape the seams, then add tongue-and-groove plywood (3/4 inch) screwed through the foam into concrete anchors. The better-but-pricier route: install a dimple membrane (like Dricore) first, which creates an air gap and allows any moisture from the slab to evaporate, then add foam, then plywood.
Flooring finish:
Once your subfloor is down, choose a surface. Luxury vinyl plank (LVP) is my top recommendation — it’s waterproof, forgiving underfoot, and easy to install as a floating floor. Rubber coin flooring is excellent if you stand for long periods (potters and woodworkers love it). Avoid carpet — it traps dust, absorbs paint spills, and holds moisture.
What not to do: Do not lay fiberglass batts directly on a concrete slab. They wick moisture like a paper towel and will become a moldy, soggy disaster within months.
VI. Step 3 — Wall Insulation (The Heart of the Conversion)
This is where your shed transforms from a seasonal shack into a true four-season studio.

Material choice — three options compared:

My recommendation for art studios: Mineral wool. Here’s why.
- It’s naturally moisture-resistant — if a leak happens, the insulation won’t turn into a sponge.
- It’s fire-resistant (important if you use solvents or have a space heater).
- It’s sound-dampening, meaning your neighbors won’t hear your late-night pottery wheel, and you won’t hear their lawnmower.
- And unlike fiberglass, it’s not itchy during installation. Yes, really.
How to install (step-by-step):
- Measure your stud spacing. Typical sheds have studs 16 inches or 24 inches on center (OC). Buy batts that match.
- Cut each batt 1 inch wider than the cavity using a utility knife and a straightedge. A slight compression fit is good — it prevents sagging.
- Press the batt into the cavity. It should stay put by friction alone. No staples needed through the face (that compresses the insulation and reduces R-value).
- For electrical boxes, cut the batt to fit around them, not over them. A small “box cutter” notch is fine.
Vapor retarder (critical step):
Once all batts are in place, cover the studs with a smart vapor retarder like MemBrain. Unlike plastic sheeting (which can trap moisture inside your walls), smart membranes open up when humidity is high to let walls dry, then close back up. Staple it loosely over the studs — don’t pull it tight like a drum.
What about the ceiling?
Yes — insulate the ceiling or roof. If your shed has an unconditioned attic space (vented), insulate between the ceiling joists. If it’s a cathedral ceiling (roof deck directly above), you need baffles to maintain airflow from soffit to ridge, then insulate between rafters. Uninsulated ceilings lose 25–35% of your heat.
VII. Step 4 — Vapor, Air, & Moisture Control (The Shed Killer)

Listen: sheds fail because of trapped humidity. I’ve seen beautiful conversions with hardwood floors and drywall turn into moldy tear-outs after one humid summer. Don’t let that be you.
The physics rule: Warm, moist air moves toward cold surfaces. When it hits a cold wall or window, it condenses into liquid water. That water rots wood, rusts tools, and grows black mold.
Vapor retarder placement: In most climates (cold winters, warm summers), the vapor retarder goes on the warm-in-winter side — meaning the interior side of your insulation. That’s why we installed MemBrain over the studs, not behind them.
Air sealing checklist (do this before insulation):
– Around windows and doors: use low-expansion foam (the blue can for windows, not the red can for big gaps).
– Electrical boxes: use putty pads or caulk where wires enter the box.
– Top plates (where wall meets ceiling): run a bead of acoustic caulk.
– Bottom plates (where wall meets floor): caulk here too.
One critical warning: Never use two vapor barriers. If you have foil-faced foam on the outside of your studs (some sheds do), do NOT add plastic sheeting on the inside. You’ll create a moisture sandwich with no way to dry. Use a smart retarder or nothing at all.
VIII. Step 5 — Ventilation (Non-Negotiable for Artists)
You might think: “I’ll just seal everything up tight — that’s efficient, right?” Wrong. Super-tight spaces without fresh air become dangerous. Oil paints release VOCs (volatile organic compounds). Glues and solvents release fumes. Even your breath releases moisture and CO2.
Minimum solution: One operable window (crank-out or sliding) plus an exhaust fan. A standard bathroom fan works fine, but spend an extra $20 to get a quiet one (look for 1.5 sones or less). Mount it in the ceiling or high on a wall, and vent it directly outside — not into an attic or soffit.
Better solution (highly recommended): An energy recovery ventilator (ERV). These small units exchange stale indoor air for fresh outdoor air while recovering most of the heat or coolth. They cost $500–800 and require a 6-inch hole through the wall, but they’re the gold standard for healthy indoor air.
Passive trick: Leave a 1/2-inch gap under your interior door (if you have a separate entry room) and make sure your roof has ridge vents. Combined with the exhaust fan, you’ll get natural airflow without losing too much heat.
Red flag to avoid: Do not seal the shed airtight and rely on “just opening a door sometimes.” You will get headaches, your paint will dry weird, and eventually you’ll see mold.
IX. Step 6 — Electrical & Lighting (Pro Advice, Not Guesswork)
Here’s the hard truth: most DIYers should hire an electrician for the main feed from the house to the shed. Trenching, burying wire at 18 inches, connecting to a new subpanel, and bonding the ground — that’s not weekend warrior territory unless you’ve done it before.

But once the subpanel is installed, you can absolutely do the interior wiring yourself (with a permit and inspection, of course).
Load calculation (don’t guess):
– 15-amp circuit: lights, laptop, phone charger, small fan.
– 20-amp circuit: space heater (1500W), kiln (needs dedicated circuit), table saw.
– Plan for at least two 20-amp circuits in any studio. Three is better.
Lighting layering for creativity:
Don’t just screw one fixture in the center of the ceiling. Layer your light:
– Ambient: Flush-mount LED panels or surface-mount wafer lights. Choose 4000K–5000K color temperature for accurate color rendering (important for painters). 3000K is warmer and cozier but skews colors.
– Task: Adjustable arm lights (IKEA has good cheap ones) over your desk, easel, or workbench.
– Accent: Track lighting or picture lights aimed at your finished artwork on the walls.
Outlets everywhere:
Code says one outlet every 12 feet. I say: install outlets every 4–6 feet along workbench height (about 42 inches off the floor). Also put an outlet near the floor for a space heater, and one high on the wall for a TV or clock. You will never look at a finished room and think “dang, too many outlets.”
Pro tip: Install two switched outlets at waist height — one connected to your exhaust fan, one for a future heater or dehumidifier. Label them clearly inside the electrical panel.
X. Step 7 — Interior Finishes (Make It Feel Like a Studio, Not a Shed)
This is the fun part. Your walls are insulated, your wires are run, your vapor retarder is stapled. Now you get to make it beautiful.
Wall covering:
Do not use drywall in a shed. I’ll say it again: do not use drywall. Sheds shift with temperature and humidity. Drywall is brittle and will crack at the seams within a year.
Instead, use:
– 1/4-inch plywood (sandable, paintable, and you can screw anything into it anywhere).
– Tongue-and-groove pine (beautiful, rustic, smells amazing, and hides imperfections).
Both options let you hang shelves, pegboards, or heavy artwork without hunting for studs.
Flooring:
– Best: Luxury vinyl plank (LVP). Waterproof, scratch-resistant, easy to install as a floating floor.
– Good: Rubber coin flooring (easy on joints, great for standing work).
– Avoid: Carpet (dust, spills, moisture). Also avoid real hardwood (humidity changes will warp it).
Ceiling:
White beadboard or corrugated PVC panels. Both reflect light well, making your space feel larger. White paint on the ceiling is non-negotiable — it bounces light deep into the room.
Color strategy:
Most walls should be a high-LRV (light reflectance value) white or light gray. This maximizes your natural light. But pick one wall — the one behind your desk or easel — and go bold. Deep blue, ochre, charcoal, or even matte black. That accent wall will become your visual anchor and daily inspiration.
XI. Step 8 — Climate Control (Heat & Cool for Year-Round Use)
You’ve insulated. You’ve air-sealed. Now you need to actually heat and cool the space.

Heat options (ranked):
- Oil-filled radiator — Safest, quietest, no exposed element. Slow to heat up, but holds heat well. $60–120.
- Infrared panel heater — Mounts on wall or ceiling, heats objects (including you) directly. Efficient for a small space. $150–300.
- Mini-split heat pump — Heats AND cools, most efficient by far. But costs $1,500–2,500 installed. Best if you use the studio daily year-round.
- Avoid: Propane or kerosene heaters. They release moisture (bad for art) and carbon monoxide (bad for you). Ventless propane units are illegal in many states for a reason.
Cooling:
– Window AC unit ($150–300) if you have a window that can support it.
– Mini-split (see above) if you want a permanent, silent solution.
– Portable AC on wheels (least efficient, but works if no window access).
Dehumidifier:
In spring and fall (or anytime it’s humid outside), a dehumidifier is essential. Get one with a built-in pump or a hose connection so you can drain it outside. Emptying a bucket every day gets old fast.
Rule of thumb: If you can see your breath inside the studio on a cold morning, you need either more ventilation or a dehumidifier — or both.
XII. The “Creative” Touch — Making It Uniquely Yours
Now for the part that has nothing to do with building codes. This is where you turn a converted shed into your studio.
Magnetic walls: Paint your plywood walls with magnetic primer (two coats), then top with chalkboard paint. Now you can hang reference photos with magnets and sketch ideas directly on the wall.
Pegboard ceiling: Install a sheet of pegboard on the ceiling above your drying rack. Push long hooks through to hang canvases or sculptures while they dry. Frees up floor space completely.
Rolling worktable: Buy a solid wood table from IKEA or a salvage yard, and add heavy-duty locking casters. Now your work surface can move from the window (morning light) to the wall (afternoon shade).
Salvaged sink: Find a small bar sink on Facebook Marketplace. Run a hose from your outdoor spigot to a $20 utility faucet. Drain into a 5-gallon bucket with a lid. No plumbing permit required, and you have a place to wash brushes.
Inspiration strip: Mount a 1×4 shelf across one wall at eye level. Add an LED strip light underneath (battery-powered puck lights work fine). Rotate small objects, color swatches, or postcards on the shelf. It’s like a museum of your own creative journey.
XIII. Common Pitfalls & How to Avoid Them

XIV. Budget Breakdown (Realistic Ranges)
Prices vary wildly by region and material choices. These are US averages in 2025–2026.
Low (basic, unheated, 3-season only): $800–1,500
– Fiberglass insulation (cheapest)
– One 15A circuit (DIY or handyman)
– Plywood walls (unpainted)
– No permanent heat (space heater on cold days)
– Used window if replacement needed
Medium (4-season, comfortable): $3,000–5,000
– Mineral wool insulation throughout
– Two 20A circuits with subpanel (pro install for main feed)
– Luxury vinyl plank flooring
– Oil-filled radiator or infrared heater
– Smart vapor retarder
– New vinyl window
High (dream studio with sink + mini-split): $7,000–12,000
– Mini-split heat pump (pro installed)
– ERV ventilation
– Full electrical permit and pro work
– Salvaged sink with graywater system
– T&G pine walls and ceiling
– Skylight or solar tube
Money-saving tips:
– Buy used windows and doors from Habitat Restore (often 90% off retail).
– Use reclaimed barn wood for one accent wall (free on Facebook Marketplace if you haul it).
– Do all demo, insulation, and finishing yourself — save thousands.
– Buy tools used or borrow from a tool library.
XV. Conclusion: The First Morning in Your New Studio
Let me take you back to that dusty shed I described at the beginning. The one with spiderwebs and a bare bulb and the smell of regret.
Now imagine this: It’s six months later. Winter morning, just after sunrise. You walk out across the frosty grass, key in hand. You unlock the door of your studio. Warmth hits your face — the oil-filled radiator has been ticking over all night. The floors are warm under your slippers. The windows face east, and that golden morning light spills across your clean worktable.

There’s no laundry. No dishes. No email. Just you and whatever you came to make.
That first morning makes every sore muscle, every trip to the hardware store, every head-scratching moment with insulation batts completely worth it.
One final caution: Take your time on the moisture and air sealing steps. Everything else — paint colors, flooring type, even electrical layout — can be changed later. But a wall assembly that traps moisture will rot from the inside out, and you won’t know until it’s too late. Do those steps right the first time.
Now it’s your turn.
What would you create in a shed studio? A novel? A series of paintings? A pottery business? Whatever it is, your future artist self is already thanking you.
If you found this guide helpful, give it a clap (or ten) and follow for more DIY creative-space projects. And when you finish your own conversion, tag me in the comments — I genuinely want to see what you build.
Now go make something beautiful. Your shed is waiting.