Side tables are some of the most important pieces of furniture required in a bedroom. If you’re in dire need of a new hobby that can teach you the basics of home improvement, then this DIY simple side table article will definitely help you.
With just a few basic materials and tools, you can plan to build a side table by yourself for your bedroom!
Tools and Materials Needed
- Brass Cabinet Knobs
- Kreg Screws 1-1/4” and 2-1/2”
- Wood glue
- Classic Gray stain
- Satin Polyurethane
- Kreg Pocket Hole Jig
- Miter saw
- Drill
- Clamps
- Speed square (optional)
- Brad Nailer
How to Build a Nightstand
Step 1 – Start Off by Gathering all Your Equipment and Tools
You can make these cabinets with premium wood or normal knotty wood that you can find at home improvement stores. There might be a price difference of about $40 between the two types of wood.
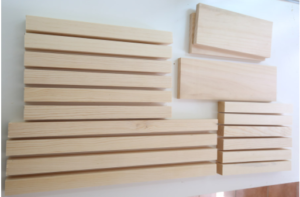
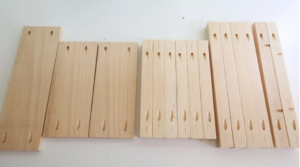
Using a miter saw, make the following cuts from the 2x2s
- For nightstand legs, you need four 2×2 of 25 ½”
- For nightstand sides, you require size 2×2 of 13”
- And for the nightstand’s front and back sides, you will require six 2×2 of 17” of wood
Then, the following cuts from the 1×6
- For the nightstand sides, you require two 1×6 of 13”
- For the back of the table, you need one 1×6 of 17”
- And for the drawer slides installed to the cabinet sides, you need two pieces of 13”
Utilize a circular saw that has a straight guide or a table saw to cut the 4 feet panel of ¾” thick
- One piece of 16” x 20” for the top of the cabinet.
Step 2 – Make Pocket Holes to the Boards Using a Kreg Jig
Ensure that you’re setting your Kreg Jig one and a half inches thick.
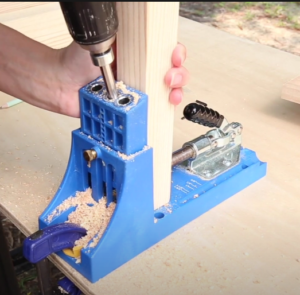
Kreg Pocket Hole Jig
Form pocket holes on each side of the two by twos that you will be using to make the front, sides, and back of the cabinet.
- Six 2×2 of 13”
- And six 2×2 of 17”
Add two pocket holes set for ¾” wood along one side of the boards for two of the 2x2s of 17”. These holes will attach the top ¾” panel board to the tables frames. This how it should look.
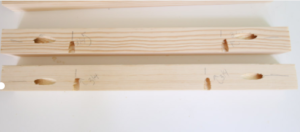
Then, add two pocket holes to the 1×6 boards accordingly.
- Two 1×6 of 13” going on the sides of the nightstand
- One 1×6 of 17” going on the back of the nightstand
This is how it should look.
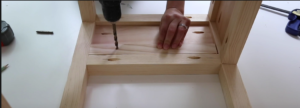
Step 3 – Assemble the Side Frames of the Nightstand
Join two 2×2 of 25 ½” boards together with one 13” 2×2 board on the end. To do this, utilize a drill and 2 ½” Kreg screws. After you do this, place one of the 1×6 boards of 13” under the 2×2 of 13” with 1 ¼” Kreg screws.
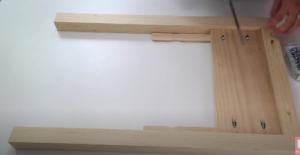
Place ¼” of wood shims under each side of the 1×6 boards or use two painting stir sticks stacks. This will attach it to the ¼” in from the edges of the 2x2s on the front end. To finish the side, use a 2×2 of 13” under the 1×6 with 2 ½” Kreg screws.
Then, add one more at 3 ½” up from the bottom of the leg sides. This will be for the bottom shelf. This is how it should look like. Repeat the process to form the other side.
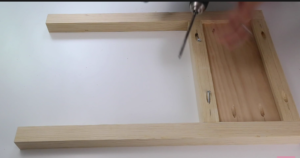
Step 4 – Join the Back of the Table to the Side Frames
Fasten the two side frames together to create the back of the table. Fix one of the 2×2 of 17” blocks (one with 4 pocket holes) at the top, one of the 1×6 of 17” in the center, and one 2×2 of 17” underneath the 1×6.
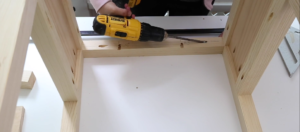
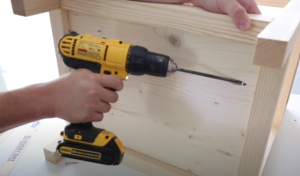
Drill
Ensure that you fasten the top 2×2 of 17” (the one with the pocket holes) in a way that the pocket holes along the edges are directed upwards.
Affix another 2×2 of 17” three and a half inches from the bottom of the leg sides. This will be for the bottom shelf.
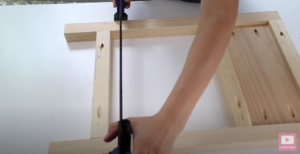
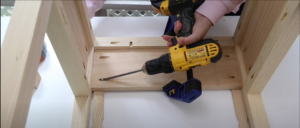
Step 5 – Assemble the Front of the Nightstand to the Side Frames
Fix the two side frames together from the front of the nightstand. You can do this by attaching the second 2×2 of 17” (the one containing 4 pocket holes) at the top of the side frames, directed inwards.
Ensure that the pocket holes along the inside edges are directed upwards. Add a 2×2 of 17” block for the bottom shelf, three and a half inches above the end of the nightstand on the front side.
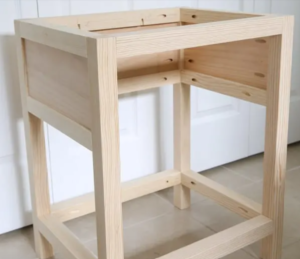
After this, your cabinet should be square-shaped so that you can the drawer can be installed correctly.
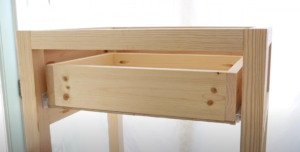
Step 6 – Build and Install the Drawer Box
It’s finally time to build the drawer.
Use 12-inch (300 mm) drawer slides with a load capacity of 55 pounds (25 kgs per pair). You can also use 14-inch drawer slides with this kind of build. Adjust the measurements given below accordingly if you’re using the 14-inch slides.
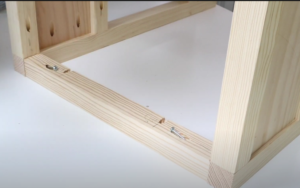
Fix the right and left cabinet sides of the drawer slides to the table.
- To attach the drawer slides to the inside of the nightstand, add some wood along the inside. That makes a flush wood surface for you on which you can mount the slides.
- Screw the ½” plywood or the ½” wood planks of 13” to both inside sides of the cabinet. They should be placed right above the bottom 2×2 of 13” with one-inch wood screws.
- Ensure to countersink the screws beneath the surface of the wood.
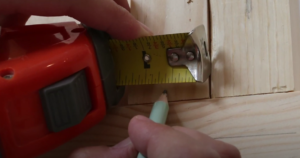
- As per the drawer slide instructions, draw a line at ¾” (which is the width of the drawer face) + 1/16” from the edge at the front of the nightstand’s legs on the front right and left sides.
- At this mark, the front of the drawer slides noted CL (cabinet left) and CR (cabinet right) must be lined.
- Mark ¾” up from the top of the 2×2 board and note where the bottom edge of the front side of the drawer should be lined.
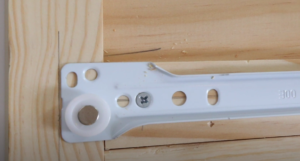
The instructions showed that there should be a mark at least ½” up, but for extra clearance, you can mark it at ¾”.
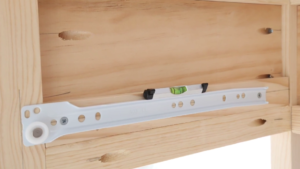
- Use a level and draw a line inside to the back from this mark. You should align the drawer slide center along this line.
- Before you screw it in, use a mini level on the drawer slide to make sure it’s leveled. You can clamp it in place for this period.
- Drill pilot holes and screw the drawer slide in its place with the screws included with the slides after checking. Repeat the same process on the other side.
Build the drawer box
- Measure the opening between the right and left legs of the table and subtract an inch. It should be 16” according to previous measurements, but it’s safe to measure it once just in case of a variation.
- Cut the ¼” plywood to this 16” broadness by 11 ¾” long. It is for the drawer’s bottom part.
- Use a circular saw and straight edge guide for cutting the plywood. You can always use a table saw for this as well.
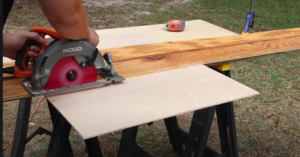
Miter Saw
- Build the drawer box frame using the 1×4 plank. For the 16” x 11 ¾” plywood bottom, make the following cuts:
Two 1×4 of 14 ½”
Two 1×4 of 11 ¾”
- On both the sides of the two 1x4s of 14 ½”, add pocket holes. Fix them to the two 1x4s of 11 ¾” using 1 ¼” Kreg screws to make the drawer box.
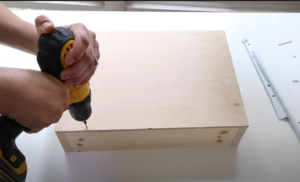
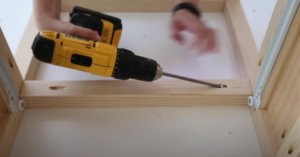
- Attach the ¼” drawer bottom to the drawer box using 1” wood screws. Make sure you drill pilot holes first.
Adding drawer slides to the drawer box
- Line up the drawer slides labeled “drawer left” and “drawer right” on the sides of the drawer. Ensure that the drawer slide fronts are fixed at the front edge of the drawer.
- Clamp them in place to easily add screws at the front and bottom sides.
- Make sure that you drill pilot holes before this.

Clamps
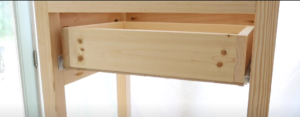
- Lastly, ensure that the drawer fits.
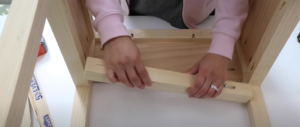
Adding the last 2×2 to the table’s front side
- Now that you’ve attached the drawer slides and built the drawer box, add the last 2×2 of 17” to the front of the cabinet in alignment with the other 2×2 boards.
Step 7 – Fix the Drawer Face to the Drawer Box
Measure the opening distance width and length where you will insert the drawer face between the 2×2 planks. You would want your drawer face to be a quarter inches less than these measurements.

This is so that there is a 1/8” gap between the drawer face and nightstand frame. On the other hand, you can also make 1/8” or 1/16” gaps on all sides if you want smaller gaps.
For the length of the drawer face, utilize a miter saw and cut the remaining 1×6 board. Use a table saw or circular saw and straight edge to cut the width cut for the width cut of the drawer face.
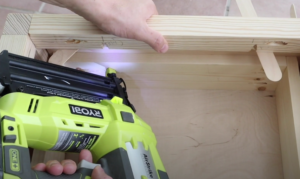
Using wood glue and 1 1/4” brad nails, install the drawer face in the drawer box. You can hold the drawer face in place using popsicle sticks to ensure that you get the gaps right while doing it. You can also insert one nail in the front and others on the back.

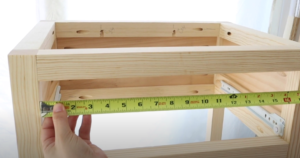
Step 8 – Install the Bottom Shelf of the Table
Take measurements of the length and width of the bottom shelf between the lower 2×2 planks. Then, cut a 3/4” panel board of the same size. It should be 13” x 17”, however, there might be some variations, so it’s better to double-check the measurements.
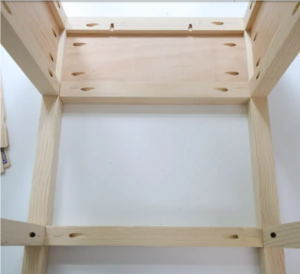
Step 9 – Fix the Top of the Table
Attach the ¾” panel board of 16” x 20” to the top of the table using 1 ¼” Kreg screws and wood glue.
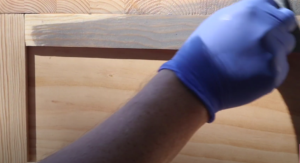
Step 10 – Paint or Stain the Table
Paint or stain the nightstands. One of the most popular combinations is doing a “classic grey” coat followed by a coat of “Early American.” You can then add satin polyurethane to finish the project.
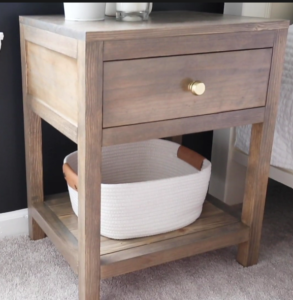
Step 11 – Add a Pull or a Knob
Finally, you’re through with building your own side table. Add a drawer knob or pull in the front to complete this do-it-yourself table.
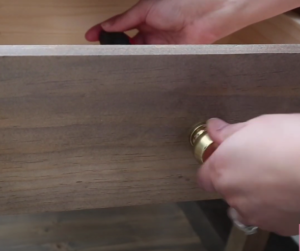
Knob
Conclusion
Now that you know what to do to build your own side table, you can always mismatch the colors and patterns of your night side. Knobs are also an important aspect of your décor, so make sure you insert one that fits the bedroom’s setting.
You can make this kind of side table in different sizes to fit your requirements. To decorate the side table, you can put a lampshade on top of it or adorn it with a vase filled with beautiful flowers. It will act as a perfect start to your woodworking journey.